Mini-White Falcon Replica
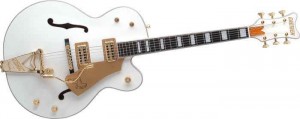
As a big fan of the Cult and Billy Duffy, I always wanted to own a Gretsch White Falcon.
But somehow I didn’t feel like paying over $3000 for a guitar. Why not? Well I don’t know. My feeling is that the guitar you buy in the shop isn’t worth >3k$.
There are lots of stories on the internet. Some say the old ones (60’s) are the best, others claim that only the latest are worth playing.
And here it is in (one of) it’s latest shape!
Anyway, I started to browse the internet for alternatives.
Of course you have the Chinese replica’s. But that’s illegal and I guess quality is a big issue.
Have for example a look at www.gillguitar.com.
But Gillguitar also offers a kit, complete with bigsby-like tremolo for around $200. The shipping says 65$ so that makes an amount under $300. Painting, adjustment and replacing the hardware should cost me around $200 so less than $500 would give me a White Falcon replica.
But looking at the Gillguitar website didn’t give me any confidence. I also found some references to fraud although someone posted receiving a pretty good looking ES335 kit.
Anyway, 65$ for the shipping seemed far too low for me (I guess it would cost around $200) so I decided to look around. What about existing guitars to rebuild these? I found some alternatives:
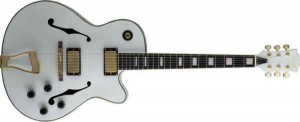
It’s a tad smaller but cheap (around 300 euro’s)
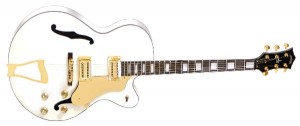
Around $300, but only available in the US.
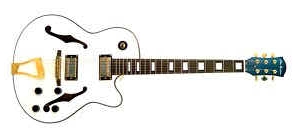
I guess it’s the same as the Stagg. Mostly guitars like this are built in large plants under different names.
And what about the Skylark White Falcon style:
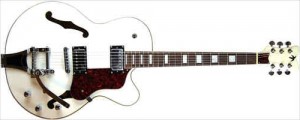
Only 300 pounds but with chrome hardware. Headstock is in correct shape. I only could find this one in the UK.
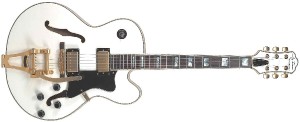
It appears to be a lawsuit model. I also found pics with a black headstock,
but this one also close. Only seen in the UK and US with a price tag around $400.
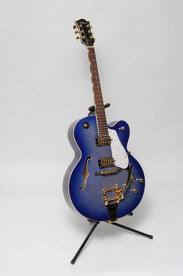
Yup, it’s ghastly blue but that was the only picture I could find. The two adds that listed this one mentioned that the
color was white (so says the WH in the type). Only 350 pounds. I also looked for brand name Coxx under which they were sold as well, but I couldn’t find anything.
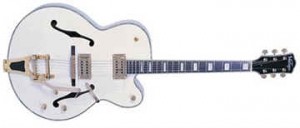
Oops, this one comes very close (for 470 pounds) apart from the headstock. Bigsby, gold hardware, correct size. Only the scratch plate should
be replaced and maybe the headstock painted in a different color.
This guitar has raving comments on Harmony Central but somehow it can only be bought in the UK.
And a more familiar brand:
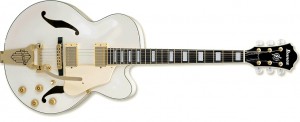
It has more it’s own identity but still nicely priced at around 450 euro’s.
Another model like the Richwood – Greaser 545 is a nice one. Big, comes with a Bigsby and is orange.
Might consider it as a later purchase but I want to go for a white one. Anyway I like the Richwood brand. My Les Paul copy is fantastic!
Choices,choices, choices…
First some issues, the Jay Turser (aka Coxx), Arbor and Skylark are nowhere to be found in Holland.
the Skylark can be purchased from the UK but the I can’t feel the guitar.
Anyway, when browsing the internet saw the Stagg on Ebay and I was able to buy it for 107 pounds. With shipping I’m just below 150 euro’s
And that’s not bad. The reason for choosing the Stagg is that it’s a tad smaller than the original. Since my brother and I are not very big guys, it’s a little bit easier to play a slightly smaller guitar on stage.
What else do I need:
- Bigsby B6 gold: 150$ at Ebay:
- GFS hot Liverpool gold: from GFS
- New Impersial Style Tuners- Rotomatic: from GFS
- Glitter gold scratchplate: make one yourself from a see through scratchplate material by spraying the backside gold (I still have a spray can gold from my Les Paul goldtop project)
- Gretsch knobs
- A bone nut
The Bigsby and Gretsch knobs can be found at this shop.
So the Stagg arrived and I was horrified. It was nothing like on the Ebay listing:
- there was a big chip of paint missing on the front of the body, even the binding was damaged
- the strings were rattling as hell, some frets had enormous fretware. It was unplayable
- the body was really discolored. That looks like an aged guitar but it was really too much
- the body was smaller than expected, an thicker. It is even smaller than my Tokai ES175 copy. Anyway it doesn’t fit a Bigsby B6.
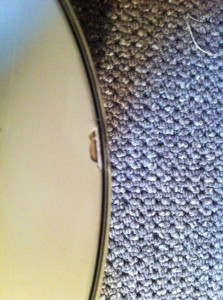
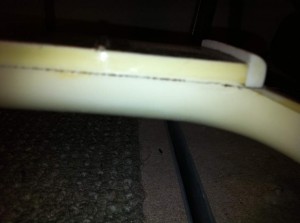
Anyway, I paid too much. If the owner had listed this properly I would never have bid up to 112 pounds.
(The bidding by the way was funny, I estimated that 112 pounds for the guitar would be OK. I was at work and decided to leave early to do the bid from home – I always bid in the last seconds-. But there were issues with the bus that should bring me to the train station. I decided to go back to the office and take a bus half an hour later. I estimated that I would be on station DElft to place a bid with the ebay app on my iPhone. But there were more delays, my train took off too late and I lost GPRS contact with my iPhone. Anyway, we were going through a tunnel when the bid passed, I thought. But when we got out of the tunnel I suddenly got contact again and there were still 36 sec to go. When I placed my maximum bid I was at 16 seconds…and I got it).
So what to do with the guitar. First I decided to do a fret leveling to see if the guitar would be playable. I also made a new nut. It turned out fantastic. Although the frets are tiny and I had to remove a lot, the guitar was suddenly playable and the new nut gave a lot more tone. The original nut was plastic (of course) but also hollow!!
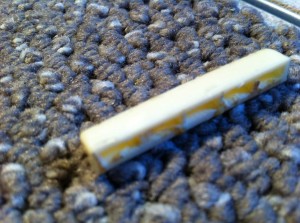
I also found out how the Gretsch factory makes such nice glittery bindings. They use wrapping material normally used for drums. That’s logical since Gretsch also makes drums! So I dived into the world that is called ‘drum wraps’. A supplier called Delmar makes this stuff and in Germany you can get it for a reasonable price. It’s just a sheet of self-adhesive plastic, a fraction of a millimeter thick. The sheets are big (meant to be used for drum kits) but they also sell wraps from electronic drum kits. I was able to buy a nice ‘Gold-Sparkle’ sheet for 35 euro’s inc postage..
So that would mean a total sanding off the paint of the Stagg. Do primer, white, clear coating and buffing. And that for a rather big guitar……mmmmmmm. Since I was not that busy at work (working from home a lot) I could plan a day to do the sanding. Guess I could do the sanding in 5 hours. But I can’t work with paint remover because that will damage the binding.
The sides will be hell because of the curvature. But I could mask the binding in order to be able to use paint remover. I’ll have to give it a night sleep…
I decided to go for it. I fist took off all parts and then taped off all bindings to prevent them to get in touch with any paint stripper.
I had a tin of some old paint stripper that I used maybe a year ago. I smeared it over the top but it gave hardly any reaction. Only after scraping with a knife some of the paint came loose. What a dirty stuff. The lacquer was a very thick coat. Then came white, then primer and under it some kind of sealer. I decided not to touch the sealer.
Sanding with 80 grid removed some paint but it went far too slow. So I decided to use my sanding mouse. Still it took ages to get through the finish, that’s gonna be fun when doing the sides…..
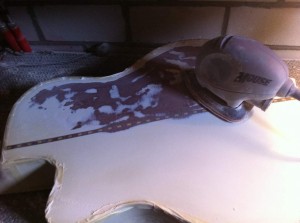
The headstock was done quickly, it didn’t have the sealer. Also the neck was easily stripped from paint only using 80 grid paper.
I decided to buy a new can of paint remover. It turned out that they changes the package but also the stuff that was in. I smeared it all over the body and it worked quite OK. With a razor blade I could remove the paint layer by layer. Overall it took me 5 days to remove all paint.
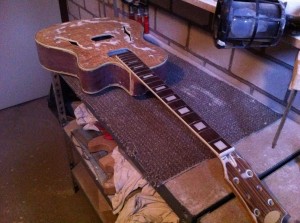
Only the binding gave a problem. The binding should be white but because of coloring at some places it was aged yellow. I first thought it had to do with the clear topcoat so I experimented to use paint remover on the binding on the back of the guitar. Oh oh, not a good idea, the paint remover damaged to binding so I had to sand the yellow color away. What a job.
I found out that the outside white band of the binding was of another material as the inner white bands and therefore reacting in another way to discoloring.
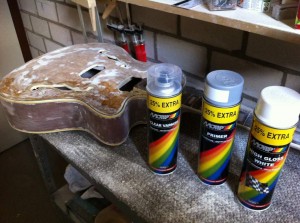
I choose to go for acrylic paint. I bought myself primer (they only had gray), a can white and a can clear coat, all of the Motip brand.
In the mean time my gold-sparkle binding arrived. It turned out fantastic only I realized that the binding was a fraction of a millimeter thick. Since by all the sanding my body is not straight anymore. What to do? If I glue the binding to the body there will be a little gap. So what are the options?
I decided to try to fill this gap with ordinary wood filler and then spray over it with primer and white. I would make a test block of wood to see if the binding stands scraping. The experiment was successful, the binding is very though and easily withstands the scraping, but I can always cover the binding with masking tape.
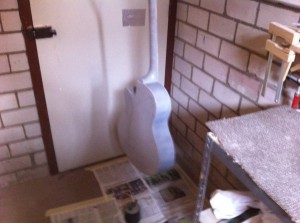
The guitar is now in grey primer. You can see some scratches of the sanding with 80 grid (that’s too much but it was the only way to remove the nasty paint). I can also see that the paint remover has eaten away some of the binding on the back. But layers of clear coat will make this invisible (I hope).
After three layers of primer, I have touched up some dents and scratches with a paintbrush. Next is to sand with 400 grid with some water and a touch of washing detergent. Then I will spray the corners with white primer.
After that the gold binding will be put on with superglue. The binding comes in three thicknesses:
Body contour back and front: 7 mm
Neck and inside f-holes: 5 mm
Headstock: 3 mm
I tried to cut the goldsparkle binding with a very sharp Stanley knife but that didn’t work out, the binding is too tough to cut this way. Cutting with ordinary scissors was another option. I put wide masking tape on the binding, set out two thin lines at a distance of each other with a pencil and a ruler and precisely cut it with scissors. It worked out fine. The binding is not super straight but it works.
The binding is glues with superglue to the body and neck an held in place by some small strips of masking tape, especially around the corners. I do about 7 to 10 cm every step (smear the glue on the binding, attach it to the body and put the masking tape on).
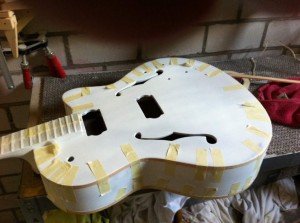
The body binding was relatively easy to do. After applying the binding a filled the gap between binding and body with wood filler. To check the result I already scraped away the primer to see what the original binding plus gold sparkle binding looked like. It was OK.
Next was sparkle binding along the neck, the headstock and the inside of the f-holes. Especially the f-holes were difficult to do because of the curves. I used an old hairdryer to get the binding in shape, then quickly apply superglue on the back of the binding and stick it on the right spot. Any gaps between binding and body are filled with filler.
As you can see from the picture, I kept the masking tape on the binding as I glue it on. Later I removed it to check it but before I spray white I’ll put the masking tape on again. I do this to prevent I have to scrape a lot of paint from the binding.
I also made letters for the logo out of the binding material. I decided to go for the name ‘STABBER’. The contours I cut out with scissors and little cutters, the ‘holes’ in the letters (e.g. in the B) where made using a drill. A little bit of sanding around the edges and the letters are ready to go.
Making sure that the binding fits smoothly around the body was hard to do. I decided to use a lot of woodfiler, sand it, spray it with primer and sand again. At some places, especially around the curves, the glitter binding is slightly lower then the body creating a gap. I had to use a lot of filler/primer/sanding to give it a natural feel.
Same for the neck. Here the gap between the original binding and the glitter binding is so big a decided to fill everything with wood filler, sand it even and over spray the complete binding with primer. I hope this will work out, I have never sprayed a binding.
If this won’t work out, I can always decide to spray the complete fretboard whit as my original idea was.
I dropped the idea to scrape the (original) bindings clean. Instead I will make false bindings as described in John Gleneicki ‘Factory Finish’ book. He outlines the body on a piece of ‘Bristol paper’, scans it into a computer and redraws the outline in Adobe Illustrator with the ‘pen tool’. I tried something the same with freeware program paint.net but that didn’t work. I found out (check some films on Youtube on the Illustrator pen tool) I had to use a vector drawing program. I downloaded a copy of freeware program Inkscape and gave it a go. It’s not that easy and you should give it some practice but I was able to make a nice f-hole and headstock ‘binding’. I also bought a piece of paper of 70 by 50 cm to outline the body.
With a marker I outlined the body, cut the piece of paper in 4 pieces that were slightly smaller than a4 so I could scan it with my flatbed scanner. I also made sure that there were marks on the pieces of paper so that I was able to precisely put them together as 4 different parts of the scan. It was quite a hassle and I wasn’t able to make a good contour of the body. In the end I came up with something else for the body binding. But first I concentrated on lining around the f-holes.
I took some wide masking tape, put that over the f-hole and cut out the f-hole with an exacto knife. The ‘tape f-hole’ was stuck on a piece of paper which I scanned. Now I had an exact contour of the f-hole. Then I drew the f-hole contour in Inkscape with the vector tool.
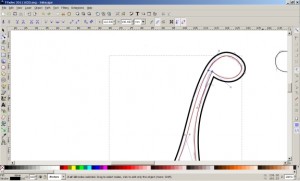
In the mean time I removed all masking tape from the body and started to scrape away the primer from the bindings. The bidning material is quite tough so you don’t have to be too careful. The f-holes were difficult, I used the pointy Stanley knife blade for that.
After removing the binding I sanded the body a little, did some touch-ups and masked the body again. Now it was time to spray paint the white.
The paint I use is very thin so you need a lot of layers. To get a feel of the paint I started of with the back-side. I did about 8 layers, done in four go’s. After the back, I put the body on it’s side and sprayed half of the back-side. I also did half part of the neck.
On the neck I wasn’t too careful and caused dripping paint.
Then I did the front of the body (again 8 layers) and after the the other side and neck.
I used one spray-can.
After the body dried for some days, I sanded the body with grid 600 and some water plus soap (to avoid the sandpaper to build up). The neck was more difficult, I had to sand the drips away with grid 60, then use grid 240 to reshape the neck and then grid 600.
But after the first on the neck with new paint, I could still see the sanding areas so some more spraying and sanding is needed here. I also did two extra layers on the (sanded) back. Looks already very nice.
Almost at the end of the 2nd spray can white. I have touched the neck up with a little bit of filler, sanded it down and sprayed again. The paint is nicely building up at the neck. I guess I have to buy another spray can white.
As the body is being sprayed, I have to consider what tremolo bar to use. It’s gonna be a Bigsby of course, in tacky gold, but here you have many choices as well.
First of all the type of Bigsby’s
- The B3 – used for smaller archtop guitars – about 19.4 cm tall
- The B6 – used for longer archtop guitars – about 23.5 cm tall
- The B7 – used on archtops but with an extra tension bar – 22 cm tall
- The B11 – a more ‘open’ variation of the B3
- The B12 – a more open and slightly smaller (21 cm) version of the B7
All these models are USA-made and are sand cast which means that the molds used are made of sand. Contrary to the models described below which are dies-cast which means that the models are made of metal, sand cast models look rough and more authentic. Die-casting enables higher volumes and is more suitable for mass production.
Some of these models are offered as (Korean) imports that are die-cast. They have an extra ‘0’ in their model number so it becomes a B30, B50, B70 etc. These models are cheaper and look a little bit smoother compared to the USA-types because of their manufacturing method.
But there are also some models offered at even lower prices, the B500 and the B700 (the more zeros, the lower the price). I have no clue what the difference is between a B50 and a B500, the Bigsby homepage and numerous websites are not clear about this subject.
And besides the ‘original’ Bigsby’s, some companies offer Bigsby look-a-likes (like ML-factory) that are even cheaper.
First what model to choose. The most of the original Falcons have a Bigsby B6. But my guitar is a bit smaller, I might go for the B3 model.
From the detailed lay-out schemes I can calculate that a B3 is about 17 cm tall (the part on the body) and the B6 about 15 cm. 17 cm is too big on my guitar, so the B3 (or B30) it is!
Some words on why not a B7 (my original choice). The B7 requires drilling in the body. You can do that on a 335 but not on a complete hollow body.
The binding had some progress. After experimenting with Inkscape I decided to make new outlines of the headstock and f-holes, scan them and create a vector drawing. It worked out perfectly:
But now it seemed that my Samsung laser printer doesn’t want to eat the decal-paper. The decal instructions claim that you first have to remove the protective layer, but I can’t find any. After a while, I found out that the paper settings of my printer had to be set to ‘thick paper, use ‘draft’ quality mode (‘best’ takes longer and will ‘eat’ the paper) and most important, curl the paper slightly in exactly the way the printer will process it. Since decal paper is quite stiff, curling the paper will make it easier for the printer to process it. Put the decal paper with the decal side up in your printer, set to thick paper, draft quality and grey tones. For printing don’t use the windows interface/driver but use a program that enables you to print the image in the correct size (I use Inkscape or Irfan view). The decal turned out to be perfect. Four layers of clear coat and you are ready to go!
For the body binding, After contemplating for a while, I decided to go for an experiment. First I bought a “paint pencil” in order to draw the lines around the f-holes. That didn’t work. Then I ordered automotive masking tape which would leave two small lines of about 1,5 mm. I gave it a go for the body binding and it turned out quite OK. I used regular black paint to make the lines.
Then I did the same at the back of the body, the fake bining turned out to be superb. So I decided to sand and respray the top and applied the masking and paint again.
The corners are still tricky since the masking tape is not very flexible but I was able to do that with regular masking tape. And I’m very content with the results. Some fine tuning here and there but the binding looks convincing.
The headstock I also wanted to with masking tape but the result didn’t make me happy. I decided to go for the decal paper trick but now in a quicker way then I did with the sound holes. I put a few masking tapes together to created a big masking tape. This I spray painted black. This big piece of black masking tape was put on the headstock so it would cover it completely and with an xacto knife I cut away along the edges of the headstock so an exact copy of the headstock would remain. This I put on a white pice of paper which I scanned. The scan bitmap was imported into Inkscape drawing program which enabled me to exactly redraw the contours of the headstock. The result looked quite good. I printed in on decal paper.
With all the bindings readu I decided to start with spray painting the guitar with clear coat starting with the back. Here a catastropy happened, the black binding cane off. Some how the binding paint reacted with the clear coat. I decided to stop immediately and think what to do.
I decided to remove all of the black paint and started to look for any alternatives. After a while I bumped into ‘Clear Shipping Labels’ from the brand Avery. I ordered a package of 25 sheets (product code is L7567-25) and the results where amazing. My Samsung laserprinter had no issues printing sharp images on these sheets despite the fact that these sheets seem ‘thicker’ than for example the decal paper. These sheets are also very easy to handle, there is a little bit of glue on the backside so when the result is not as you expected, you can remove the sheet carefully and put it in the correct place. The end result does react a little bit with spray paint. Best results are achieved by spraying a few thin layers of clear coat so the ink on the sheets ‘settles’.
So I did all the bindings (body bindings on back and front, f-hole and headstock bindings) with these ‘shipping label’ sheets. Results are close to perfect. As for the decal paper I used Inkscape to create the binding images. Anyway, these Avery shipping labels sheets are my choice for creating logo’s and fake bindings.
Before finishing the whole guitar, I did what I already should have done in the beginning, I did a full guitar set-up with all the electronics. Especially getting the potmeters in place in the hollow body was quite a job. I tried little strings to pull the potmeters through the holes but that didn’t work. What finally did work was to use the outer plastic shielding of TV coax cables. So I took a piece of coax cable and I removed all the copper and metallic shielding inside resulting in a small empty ‘tube’. This tube fits on the top of a potmeter (requires some pressure but it fits).
Four pulling 4 potmeters through the holes you need 4 of these tubes. First pull the tubes through each of the potmeter holes and let them all end up in one of the pick up holes. Then carefully attach the potmeters to these tubes and pull, again carefully, the tubes in such a way that the potmeter ends up in the correct potmeter hole. You really have to to this step by step, making sure that the internal wires don’t get in the way. It took me three times before I succeeded.
Hey Ed,
do you have some pics of the finished guitar. perhaps some audio files as well. I’m really curious as my next guitar needs to be some sort of white falcon kind of guitar. Home build is even more fun to do!
Hi Menno,
Thanks for your feedback! Sadly the mini White Falcon has to wait to get its final clear coat finish. I’m currently busy finishing another guitar for a friend of mine, but the Falcon will be next. And I will definitely put some sound files on my page. Keep coming back for the updates!
Ed
Do you have a link where you bought the binding? Im also looking for that gold sparkle sheet but i can only find a sheet that is 106 euro, wich is way too much for just binding.
Hi Menno,
Check Stdrums.de. They have smaller and cheaper sheets for electronic drums. I got the KD140Xall – gold sparkle.
http://www.stdrums.de/shop/product_info.php?info=p2241_kd140xall.html
Good luck!
Edwin
Thanks edwin,
I will take a look there. Hows your white falcon going btw. I just received my neck after a two month waiting, but i want to make progress and luckily i found your blog again, with some handy links that i needed.
One final question, i could not find this on their site. But wat thickness does the gold sheet have? Is it paper is is laminated? Im thinking about attaching it to a white/black/white binding with aceton, but i need to know if the gols sheet is made out of plastic or not in order to have this work.
Hi Menno,
The material is multi-layer plastic and is about 0.8 mm thick. The base layer is white, then there is the ‘sparkly’ layer and on top a transparent protection layer. I think Gretsch uses it in combination with black-white-black binding.
Supplier of black-white-black binding:
http://www.tonetechluthiersupplies.co.uk/guitar-purfling-laminated-plastic-black-white-black-1-5mm.html
Applying two separate bindings is quite a challenge. You can check at my ‘Guitar Building Course @ De Gier’ page how it can be done. Trick is to route for two bindings of which the outer binding is a little bit deeper.
First apply the inner binding (the black-white-black) using pattex classic glue. Pre-shape the binding by using a hairdryer for those difficult corners. Then apply the sparkly binding the same way. By carefully rasping the top of the bindings (they will be higher then the body) you can make the bindings even with the body. Transparent lacquer will do the rest.
I tried to do it the fast way: gluing the sparkly binding to the sides and using a ‘binding’ printed on decal paper on the top. But it doesn’t work out as I hoped. I might remove everything, also remove the original damaged binding and add a new binding as described above.
But (and that’s your other question) I am too busy with other projects (a never finished strat project from a friend of mine, a EVH-striped guitar for my 4-year old nephew etc. etc.) so the mini-white Falcon just has to wait. Hopefully not too long.
Hope you make more progress than I do. Please keep me updated!
Ed
Thanks ed,
Im thinking about ordering a more expensive binding as this thicker , 2 mm. This way i can sand some of the side without destroyibg the sparkle binding. I had found a dutch website where i could order this stuff, but the size was limited to 100 cm, and i need 132 to get my body completely bound.
You track my progress at http://www.gitaarnet.nl/forum/showthread.php?161794-Fender-white-chicken-replica
Rushing a guitar build is never a good idea, it wil take some time to get everything ordered. Biggest challenge is getting stuff for a reasonable price. Im looking for a bigsby b16 , wich i will cut in half so i only end up with the bar piece, but to buy something for 180 euro and throw away 2/3 doesnt feel right 😉 the weird thing is that a lot of people are looking for such a bigsby, but nobody is selling them. Like this http://www.tdpri.com/forum/attachments/tele-home-depot/131689d1340259768t-tele-bigsby-little-bigsby-007-jpg
Ps also a fellow dutchman, well i guess my name gave that away allready 😉
Hey ed, just wanted to let you know i’m allmost done with my white chicken replica. This week ill spray it with 2k, so only one day curing time.
You can see to the progress here. The drum wrap was a pain in the ass to handle, but i managed to get it done.
http://www.gitaarnet.nl/forum/showthread.php?161794-Fender-white-chicken-replica/page14.