Guitar Building Course @ De Gier
Guitar building course at “De Gier Guitars”
Finally, on the 7th of March 2009 I started the guitar building course at De Gier Guitars at Schiedam. I was a little bit tensed about what to come. My fellow starting guitar builders looked a little bit more advanced bringing equipment and pieces of wood. The only thing I brought was a (not very clear) life size print of the guitar I wanted to build. But it turned out to be exactly what I needed.
I wanted to build a Gretsch ‘Billy Bo’ model. Why this model? I intended to build a kind of Eddie van Halen MusicMan although I already have two guitars of this model. And you can already buy a great MusicMan Axis for about 1600 euros. The guitar I was about to build would easily cost double that amount, so why not make something special?
Therefore I decided for the Billy Bo. A real blues beast of which I fear that the factory model is inferior to the models that Billy Gibbons plays himself.
And I wanted to have a vibrato (a real Bigsby) on the guitar. A Bigsby turned even cheaper than a traditional Gretsch bridge so the price was not an issue.
Below, the activities per day.
Day 1
- Cutting a drawing of the body
As basis for the drawing I used a picture of the guitar taken from the Gretsch website. This picture has been taken perpendicular of the body so all measures should be correct. Based upon the string length (24,75 inch) a ‘blew-up’ the picture to make it life-size. With the graphics program Vectorworks I detected the contours of the picture and made a life-size print of the contours.This print was the basis of my design. With the help of standard drawing contours I redrew the contours so they became really fluent. Then I cut out the body.
- Making a mold from MDF
The idea is to make a mold for the body, neck and headstock from MDF (18 mm thick) to use this for the routing machine.- First cut a piece MDF which fits the body
- Redraw the body contour from the paper model onto the MDF.
- Roughly cut the body contours from the MDF.
- Sand the contours of the body with a sanding belt and sanding rolls.
Since the MDF mold is used for routing, the sides have to be perfectly perpendicular so the sanding has to be done very carefully. The straight lines have to be done by hand with a rasp. The sanding belt will (because of difference of pressure) not make clear straight lines. The curves can be done with sanding rolls that come in different sizes.
Check with by touching with your fingers if the lines and contours are perfect. You can feel all the blemishes and you should correct them. Every investment in a good mold will pay itself back 10 times.
Also check the straight lines with a ruler. Hold the mold and rules against the light to see if any light peeps through. If that is the case your line is not dead straight.
Day 2
- Finishing the body mold.
- Making the mold for the neck. Also from 18mm MDF. These are the steps:
- Draw the middle line on the piece of MDF
- Draw the length of the neck on this line
- Draw a perpendicular line on this length line for the nut and the 22nd fret
- Link these lines so the contours of the fretboard are drawn
- Cut the neck mold roughly.
- Sand the sides of the neck mold. At the 22nd fret the corners must be rounded a little bit.
- Making the neck pocket from (thin) MDF
When the neck mold is finished, draw the outlines of the end of the neck mold on a thin piece of MDF for the neck pocket mold. Cut the contour out, first roughly, then file the lines. When the mold is ready, it should just (not) fit the neck mold. Because the neck is tapered, you have to put the neck mold and neck pocket mold perpendicular from each other.The neck pocket is extremely important, if it doesn’t fit perfectly, you better make a new one.
- Next step was to select wood (mahogany) and to (flamed maple) for the body from the Gier’s wood stock.
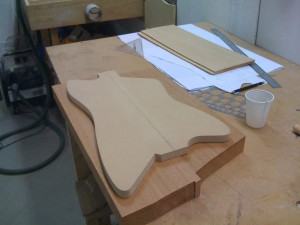
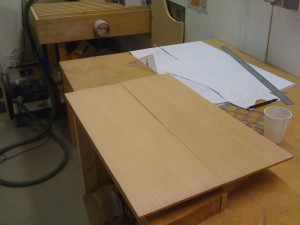
- When we decided how the body would be constructed (from two pieces) and the neck would be made (from that same piece of wood), I cut out the pieces roughly from the wood.
- The sides that would be glued to each other had to be flattened first on a special machine. This is very important, the sides that will be glued to each other must be so smooth that they almost are ‘sucked’ to each other. I used a facing machine although it can also be done with a planer.
- The up and down-sides of the wood are straightened on a sanding machine. Also the maple tops are straightened until they were about 5 mm thick.
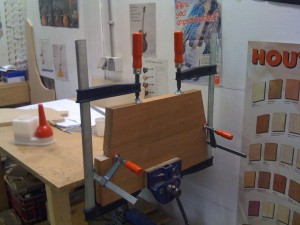
- Gluing the body parts together
- Put a lot of glue on both sides of the body parts. Then clamp the parts together with a few big gluing clamps. Use pieces of trespa to have the clamps not damaged the body wood. After about half an hour the clamps could be removed.
-
Glue the top parts together.
The sides have to be made straight with a planning machine. Then put glue on the sides and clamp them together.
Day 3
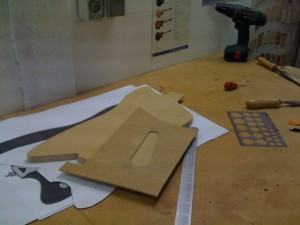
- Make a pick up mold from thin MDF
This goes the same way as making the mold for the neck pocket. Take a piece of thisn MDF and draw the outlines of a pickup on it. With a jigsaw you can roughly cut out the wood in the middle. With filing and sanding all lines can be made straight and curves can be rounded. The pick-up should just fit the mold. - Routing the pickup cavities from the body mold
- Stick the pick up mold on the body mold with double sided adhesive tape and rout a 8 mm deep wood from the mold. Do this for both pick-up cavities.
- Making molds for the electronic cavities
This goes the same way as the for the pick-up cavities. But make two molds, one for the cavity itself and one mold a little bit bigger that must fit the electronics cover plate. Route these two molds into the body mold
- Glue the top on the body
With little nails you can make sure that the top will be glued perfectly on the body after glue has been applied to the body and top. Clamp them together making use of trespa to avoid and damage to the wood. - From now on, only use a rubber mat to work on.
Day 4
- Make the headstock mold from 18 mm MDF. This is a tricky job. I first made a paper design but I decided to make one piece of the design and mirror it. This way the headstock becomes perfectly symmetrical.
- Draw the outline of the body on the body wood.
Roughly cut the body contour from the body - Cut more precisely (1-2 mm) cut around the body contour
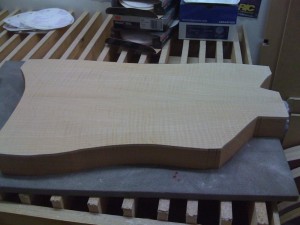
- Routing the body
Now it becomes serious. You have been working for three days on molds but now the body is going to b e made. The body mold is stuck to the body wood with double sided adhesive paper. The routing is difficult especially the roundings. If you go too fast, you will tear out the wood, if you go to slow you will have pieces where the wood is burnt. You route about 5 mm at a time.
Try it a few times ‘dry’ to get used to the smooth movements. When routing, don’t push too hard but also not too less
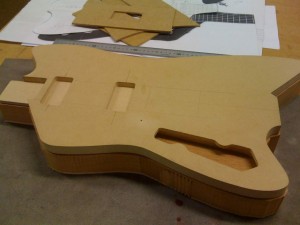
- Routing pick-up cavities
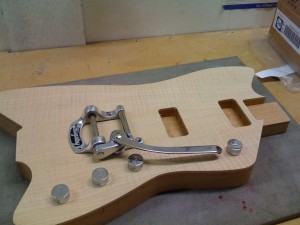
- Routing electronics cavities
Now it becomes serious, we start routing the body. You have been working for three days on molds but now the body is going to b e made. The body mold is stuck to the body wood with double sided adhesive paper. The routing is difficult especially the rounding. If you go too fast, you will tear out the wood, if you go to slow you will have pieces where the wood is burnt. You route about 5 mm at a time. Try it a few times ‘dry’ to get used to the smooth movements. When routing, don’t push too hard but also not too less.
Day 5
-
The binding is being routed by choosing another routing bit (wider diameter). I will use a double binding so I have to route twice.
Since the body has a straight corner and this can’t be routed, I had to use a chisel, also for the binding slots. This is a very precise job (Sander did it for me, I probably would have ruined the body)
- Applying the binding 1
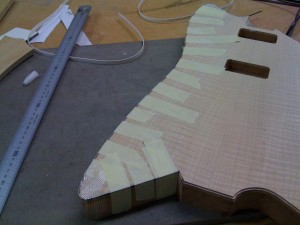
The body is ready now. Next step is to apply the binding. I have not chosen the easiest body shape so gluing the binding is a tricky job. Pain points are the sharp body corners and the straight angle.For the body corners, the binding first has to be made into shape by using a hairdryer. Make the binding ‘hot’ (not too hot) and shape the binding around the corner. When do you have to do this heating? When you put the binding around the body (without glue) and you see that a little gap shows up, you have the pre-shape the binding. So first do a dry run of fitting the binding around the body.
Prepare a number of 1 cm width pieces masking tape (about 25) of about 5 cm length. These pieces will be used for keeping the binding in place.
When the binding is in shape, smear glue (pattex Classic) on about 5 to 7 cm of the binding material. Press the binding on the body, the binding may stick up above the body but must be attached perfectly to the body. Then use the pieces of masking tape to keep the binding in place. First stick the masking tape on the side of the body, then use a little bit of pressure to stick the tape to the top. But don’t use to much pressure. Stick a piece of masking tape at about every 2 cm.
Day 6
- Finishing binding 1.
- Binding 2
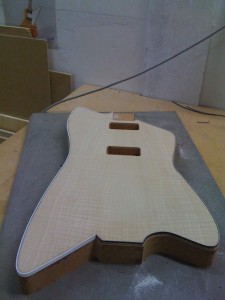
Making the second binding was even more difficult than binding 1. The binding material was to ‘high’ so I had to cut at the correct height first with a band saw.Again do a dry run for applying the second binding. Use the hairdryer for the difficult curves. Prepare the masking tapes pieces and glue the second binding on the first binding.Sometimes you need more tape strength around the corners. Don’t use masking tape for this but use the tougher see through tape.
- Binding finishing
When the binding is glued to the body, it will still stick out a little bit above the body. To remove this piece of the binding, use a rasp and keep it as horizontal as possible on the binding and body. Keep your left hand (when you are right handed) at the top of the rasp to guide it over the top of the body. With your right hand (finger) you put pressure at the back of the rasp to remove the binding. Be careful, don’t push to much and only remove binding from the outside to the inside movement (otherwise you put pressure on the binding which will remove it from the body). When you hear the binding ‘rattle’, it’s not correctly attached to the body. Isolate this piece of the binding and body with masking tape and put a little bit of super glue between body and binding. Apply some pressure for a minute or so and the binding is fixed.
Day 7
- Finishing the binding
- Route the rounded edge at the back of the body.
- Making of the ‘Belly contour’
Draw the bell-cut roughly by hand, depth is about to half of the body. Then use an electric rasp remove the wood roughly. When you have reached the correct depth, use a finer hand rasp to make the surface even (feel the contours with your fingers). When rasping make sure the weight of the rasp is on the top and bottom of the rasp so you remove wood at the middle and not only at the top or only at the bottom.With a pencil you can draw some lines. When rasping you can see from how the lines are removed in order to keep control of rasping.The give the belly contour a rounding at the top by rasping in three phases. First perpendicular to the body, the 45 degrees from above and 45 from below and you have a round edge. Make the rounding fluent with 120 grid sanding paper. - Glue neck
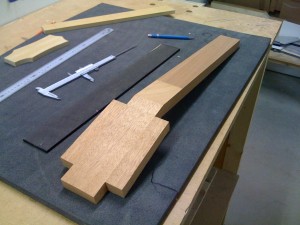
First plane one side of the neck wood. Cut the wood under an angle of 15 degrees. Then plane the edge. When planning put pressure on the front and end of the planer and plane under an angle so you make beautiful wood chips. Then glue the two pieces of wood together. Make sure that the headstock is not displaced. You can avoid that by clamping the whole construction to the wall.
Day 8
My first neck was ruined when routing a neck binding so I had to make a second neck the following way:
- Flatten the neck and the headstock on the planing machine. Always keep measuring if the surfaces are straight.
- One side neck areas
Same as above but now the sides. - Headstock widening
Glue two pieces of wood on either side of the head. - Truss rod cavity routing
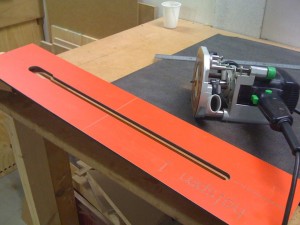
Sander had a standard mold for the truss rod cavity. Stick the mold neatly with double sides tape on the neck and then route the cavity.
- Fretboard surfaces (planing and sander)
The ebony should also be flattened. Sander has developed a wooden structure that enables you to hold the piece of ebony when flattening it, so you don’t have to hold it yourself. - Fretboard sawing
The slots in the fretboard should be sawed. Sander made a nice machine that made a lot of noise (wear hearing protectors). It went all OK though I made some slots wider than expected.
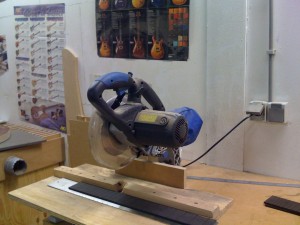
- Truss rod installation
The truss rod is laid into the truss rod cavity. Put a piece of wood on top of the truss rod to prevent the truss rod from rattling. - Fretboard drilling nails plus installation
Next step is to glue the fretboard on the neck. When doing this here’s a good chance that if the fretboard is clamped on the neck, it will shift a little bit. To prevent this there are two holes drilled in the first and last fret through the fretboard and neck. Put little nails in the neck holes and remove the ‘heads’ of the nails so that they come up about 2 mm above the wood. When putting the fretboard on the neck, make sure that the little nails fall into the holes in the fretboard. The fretboard can’t move now. - Fretboard gluing
Add the glue and put the fretboard on the neck. Add some clamps. - Neck Contour rouding
Then, after drying stick the neck mold on the neck wood with double sided tape. Route the exact neck contour with the router. - Routing head stock
- Make a smooth head-neck transition
With a little file make a smooth transition between the neck and head.
Day skipped because of Hague Jazz festival.
Day skipped because of vacation
Day 9
And then it went wrong with the neck. When routing the space for the binding at the neck, the mold moved and I routed into the fretboard. It was beyond repair (I also put too much force on the router, the space for the binding turned to be 2 mm instead of 1.5 mm in some places). Creating a new neck was the best option. The first 4 steps of 8 day are the same.
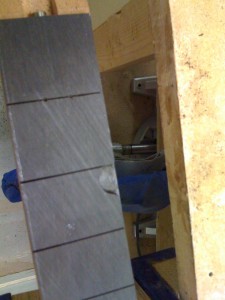
- Make fretboard in correct width on the flattening bench
Draw a center line on the fretboard. Draw the width at the ends of the fretboard . Make it the correct shape on the flattening bench. - Gluing binding on the fretboard
Stick the binding on the table (length must be slightly larger than the fretboard) so that the binding won’t curl up (the ends to down, not up). Then put superglue (classic) on the binding and put the fretboard in place. Put some pressure on the fretboard so the binding sticks well to it.
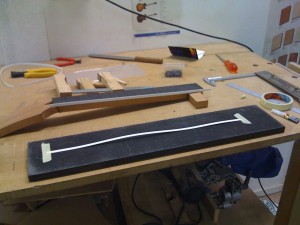
- Rear binding gluing
With a chisel make a nice piece of binding and glue it against the back end of the fretboard. - Binding leveling
Put the fretboard on a board and clamp it down completely. Now take a rasp and make the binding level with the fretboard. - Bottom fretboard scraping
What you can’t remove with the rasp must be removed with a scraper. - Side position markers
Clamp a piece of wood on the drilling table. Along this piece of wood you lead the fretboard so that the markers are equidistant from the top of the fretboard.
First mark the correct positions (to be checked by someone). Drill a little hole in the wood.
The markers consist of a sort of string of plastic. Put a little piece of the string in the hole in the wood . With a hammer you strike the plastic further in the wood. - Glue fretboard on neck
We didn’t use the nail method since the fretboard fits perfectly. - Scrape the body binding
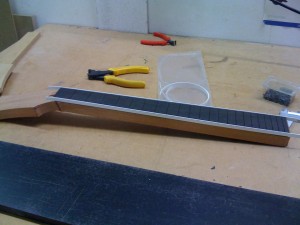
Day 10
- Heel of the neck calculation
Now the back of the neck be adjusted. The important part is the “heel”, which should slant slightly so that it is under an angle from the body. In order to calculate this angle, the slope of the strings must be determined.
For a Gibson type bridge, the string height at the bridge is about 16 mm. The fretboard comes at a height of 10 mm from the body at the 22nd fret. The distance from 22nd fret to the bridge is 160 mm. All in all, there is a difference of 6 mm over a 160 mm distance.
The same ‘slope’ should be reflected in the ‘heel’. Since the ‘heel’ 75 mm long, the ‘slope’ over the heel should be around 3 mm.
I choose a medium thick neck. Start with a neck thickness (excluding fretboard) of 16mm (plus fretboard 20 mm) at the highest fret. This should drop to 14 mm (ex. fretboard) at the first fret.
Draw this line on the side of the neck. - Neck outline and rough cut
Saw the neck at 1 mm from the line. - Side neck rub
In principle, the neck should perfectly fit the neck pocket. But there are minor differences making that the neck won’t fit. Both sides of the neck should be lightly sanded to fit the neck pocket perfectly. Take a piece of sanding paper and wrap it around your Trespa sanding block. Clamp the neck in the workbench and sand it with a regular stroke (using the full width of the sanding paper) for a fraction of the side of the neck pick up. Be careful not to sand too much off. Sand from the heel of the neck to about halfway the neck. Sand both sides of the neck equally.
Fit the neck, you should not force it but some force is needed. - Heel adjustment
The heel must now be made into a smooth surface. This is a lot of work and requires continuous measurement (ruler over the surface to keep both length and width at various points) to obtain a perfect plane. - End Heel
Because the neck is inclined now, the back of the heel should be adjusted so it fits the neck pocket. Draw a line from 1 mm to the underside of the neck to the (very) near the end of the heel. Rasp or file this piece of neck wood away. The neck will now fit perfectly. - Neck areas
The back of the neck should be flattened. Do this with an electric rasp and if you come close to your line use a normal rasp. Make smooth strokes and make sure the rasp is not tilted. The trick is to grasp the front of the rasp and pull it as if the rasp would bow upwards. In this way you put no weight on your right and will you make straight strokes. Do continuous measurements with a ruler. - Stock head thickness sanding
This is a pretty large device that sands away superfluous wood evenly from the headstock.
Day 11
- Applying radius to the fretboard
First make the neck as straight as possible with truss rod. Try loosening the truss rod or make it tighter to make the neck as straight as possible (check with a ruler). Stick the neck to the work bench with double sided tape. The neck is probably not completely flat on the bottom, so stick to the neck at the corner of the table so that the neck is stable. The idea was to have a radius of 12 “. Because you usually sad more away it is advisable to take a higher radius, in this case 14”. At the bottom of the radius block you stick sanding paper (80-160 grid) with double sided tape. Then sand with short strokes, the fretboard. Use two hands to go as straight as possible.
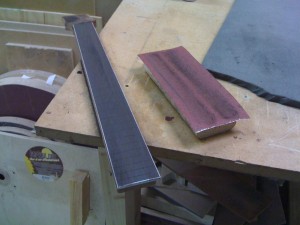
- You will see that the first outer edges sanded, the wood is this cock of the barns. Make sure the transition between sanded and sanded wood niet0 a straight line is (and remains) the full length of the neck. If this line (and, it there are two natural) diagonal runs / walk, push too much or too little on one side. Go easy and take your time. You will see that the lines closer to each walk until they touch, then you’re done. When I finally did it so well that I am a neat 14 “radius was about (after measuring with a meter radius). I decided to do and nothing to stop there, the neck is now flatter than originally planned. Then the fretboard be sanded with fine grit (600). Take a small thin trespa and fold the sandpaper around it so it looks sleek not Lubbert at the edges. If it does shed more than Lubbert away at the edges and you forfeit the beautiful curve of the fretboard. Sit comfortably on the fretboard with a sanding block and make sure you follow the curve of the barns. Sanding scratches all gone. If you have a slight angle to the fretboard looks dull spots you can see, there you are still not there. Occasionally check the radius to the radius meter and nothing can go wrong. Do not forget the sandpaper to knock off occasionally so schuursel again removed from the grit of the sandpaper.
- Apply frets
One of the major challenges. It is not difficult but with patience and keeping in mind some basic rules, it shouldn’t be too much of a problem. Because this neck has a binding, one additional action take place.
1. Cut the fret with a special tool (stewmac ‘fret pliers nipper’) so there is some metal removed from the fret bar.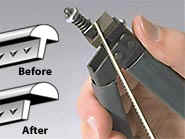
Stew Mac’s fret cutter 2. Fit the fret in the fret slot. Keep a space of 1 mm between fret bar and binding. Cut the fret at the other end to length.
3. Also remove the other side of the fret bar.
4. See if the fret fits into the fret slot. On both sides there must be 1 mm space between the fret and binding.
5. Press the fret into the fret slot on the left and right (with your thumb). The fret should not fall in the next step.
6. Keep your thumb left on the fret and use a hammer to carefully hammer the fret in the frets slot on the right side.
7. Repeat step 6 for the left side. The fret is now stuck in the fret slot on both the left and right side. Check if the fret is equally stuck in the fret slot.
8. Now the fret has to hammered into the fret slot over the whole width of the fret. Hammer carefully from right to left and from right to left so the fret ends up in the fret slot.
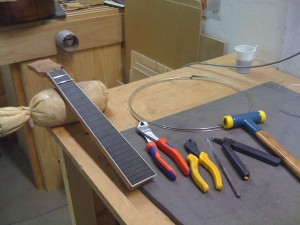
9. Cut the piece of the fret that sticks out with pincers . Keep the pincers horizontal so the force on the fret is horizontal. If you keep the pincers vertical then it’s likely the force of the pincers will pull the fret out of the fret slot.
10. Carefully hammer on the fret from left to right and vice verse to be sure that the fret is fixed. Don’t use too much force, you might hammer dings in the fret so the fret becomes uneven.
Day 12
- Insert last frets
- Round the fret endings
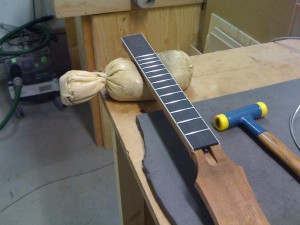
With a special file, sand the frets under an angel. It’s a nasty job. Really take your time because you don’t want to hit the frets with your file, it leaves nasty scratches that when they are too deep ruin your fret.
- Smooth the headstock – neck transition
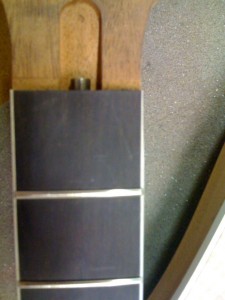
Oops I made a mistake. I removed the binding partly, typically a moment of zero concentration. It ruined my day (in fact the whole week) but there was no way I could fix it. Let’s say, this proves it’s a hand built guitar.
- Rounding neck
Draw lines
First choose the type of neck. I choose the ‘Fender’-type neck in which the rounding stays the same over the length of the neck. Take a piece of paper and draw the desired rounding of the neck at the first fret at 1:1 scale. Also draw the binding if it’s there (like in my case). Next draw the box of the neck. Because the neck has a binding, the curve of the neck shoudl stop about 1 mm under the binding. Now use the curve templates to draw the desired curvature . As a last step you draw the tangent of the curves.The tangent points must be drawn on the neck. Do it at the first fret and somewhere at the 12th fret and draw the lines all over the neck.
Now you created the area on the neck that has to be removed. You can remove it by using an (electric) rasp.Remove the wood
The majority of the wood I removed with a electric rasp, but the last pieces of wood a removed with a normal rasp. Make sure the surface stays even over the complete length of the neck. New Lines
When the wood between the lines is removed, you must draw two tangents of your neck curve on the piece of paper. Measure them and draw them on your neck. Again remove them with the (non-electric) rasp. Now your neck has roughly the desired shape in so-called facets.Remove the facet lines
Lock the neck in such a way so the round part of the neck is faced upwards. Now gently remove the straight lines of the facets with a rasp. Do it slowly and carefully. When the lines are removed, use 80 grid sandpaper to make the roudings more even.Perfect the rounding
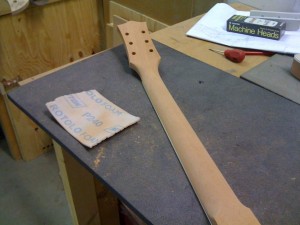
In order to perfect the rounding, use a piece of 80 grid sandpaper, pull it over the neck and sand by pulling sideways at the sandpaper. use some power because otherwise you’re only scratching the wood. Continue until you don’t see a straight area anymore at the heel of the neck.
Dag 13
- Transition neck shaping
The transition from a curved neck to a flat headstock must be really smooth. File straight surfaces with a small file and round these surfaces. Check with your fingers if the transition is really smooth. It was a very difficult job to do, Sander smoothed out the last inconsistencies. - Neck fine sanding
This is mainly done to remove the burns spots from routing and other bumps. Use two grains of sand paper, P120 and P240 for the rough work and for the finer work.
With a piece of sandpaper to a smooth piece of plastic curved surfaces can be sanded. Careful not to sand off too much, continue to check continuously (look and feel).
Flat parts such as top and bottom of the head and neck very bottom with sandpaper wrapped around a rectangular piece trespa. Make sure the sandpaper is wrapped tightly around the trespa, or it “flubbers” around the sides and prevents you from obtaining a perfectly flat surface
The back of the neck, the spherical part, sanding with emery cloth fine you. Be sure not to grate residue longer see.
To check that you have sanded everything you can with a little white spirit on a cloth on the stain which will simulate Coming up. As the ‘wet’ wood looks, so it looks Coming up after the pickling off. - Drain neck
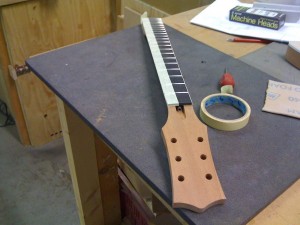
Subsequently, three strips afplakplakband used to tape the fretboard. Make sure the tape is all over every fret (press down with your fingernail) and the mid-bond tape should run.
Day 14
- Drilling holes for the potentiometers
From the drawing you can pierce small holes with an awl at the locations where the holes must be. Use the drill column with a (sharp) 10 mm wood drill. Put a piece of wood underneath to prevent wood chipping. - Fine sanding of the top
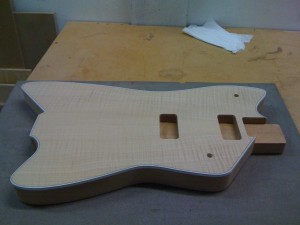
Using a sander and P240 sanding paper to fine sand the top and back. There should be no visible scratches. With cleaning spirit you can check if there are any scratches left. - Fine sanding sides
Use P120 and P240 sanding paper to remove the burn marks, adhesive sanding and milling lines. Use a sanding block and for the curves a piece of flexible rubber to wrap your sanding paper around.
Especially the glue remains from gluing the binding should be removed. Check the result with cleaning spirit.
Day 15
- Fine sanding body and top
Continued from the previous week (it’s a tedious job). - Milling electronics cavities
By cutting out the cavities 3 mm. Sander had these templates in stock so I didn’t have to make them my-selves. - Drilling neck mounting
I will use neck sockets instead of a neck plate. The neck sockets must drilled with the drill column. Set the correct depth and drill with a 13 mm drill. - Drilling jack
First with use an awl to pierce the correct location, then with a small wood drill (1.3 mm) drill freehand the first hole. Next use a large drill to drill the final hole.
It turned out we used a 10 mm drill where it should have been 13 mm. The existing hole was made larger with a “broader” (so not by drilling again with a 13 mm drill). - Staining the body
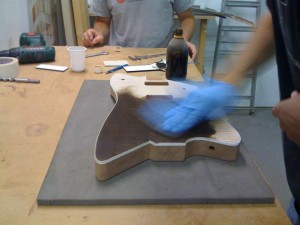
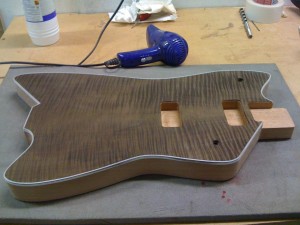
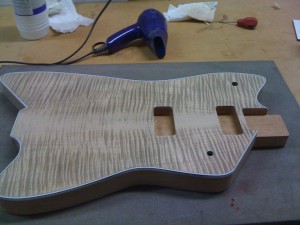
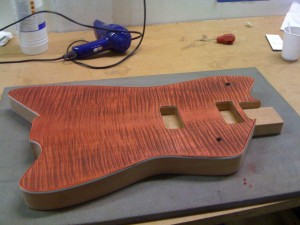
First the top was stained with Tobacco stain. Then the top was sanded so the tobacco would only be visible in the grains of the maple top. Then the top was stained again with red.
Let the body dry, use a hair dryer to dry it faster.
Place absorbent paper on your work table. Place the guitar on the top and stain the back with black stain. Do not forget the edges of the holes. Then put the guitar on the side and stain all sides black. Please note, there should no black stain end up on the red top.
Then stain the neck. Note the edge just below the fretboard, which you will see so it must be nicely black as well.
Day 16
The whole day I spent cleaning the binding. Using a blade of a Stanley knife (you can get them in sets at the do-it-yourself store) and paint remove blades) carefully scrape away all stains. Hold the knife in such a way that you don’t take away the stain from the body (use a finger as a guide along the body). All spots should be scraped away. What a job.
Day 17
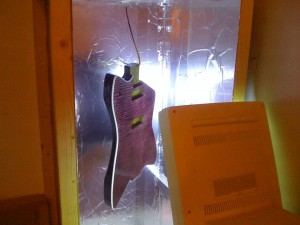
Spray with UV paint in the spray cabin. First blow the dust off.
Systematically spray the body:
- top left, top right. Hold the body by its hook
- bottom left, right bottom. Hold the body by its tremolo hole
- left side. Hold the body by its hook
- the right side. Hold the body by its hook
- back (turn the body at the hook and hold him down)
- same for the front.
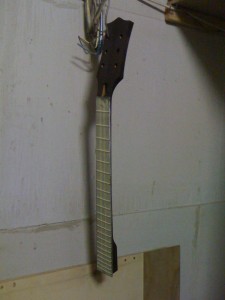
Same goes for the neck. First the top, then bottom, then sides, then the back.
Apply paint with broad movements from left to right where you make half overlap. Never spray from the bottom to the top.
After spraying, first let the solvent component evaporate for about 10 minutes. Then put each side for 5 to 10 minutes in front of the UV lamp. Then sand with P240. Be careful not to sand through the paint and hit the stain. Be also aware that the paint absorbs some of the stain. SO let your paint always have a minimum thickness otherwise you will see bald spots although you didn’t sand through the paint.
Do not sand with water. When water comes in the holes (for example, the potentiometers holes), it will cause wood to expand.
The neck gets two layers. The body, the maple top absorbs more paint, 4 coats.
Day 18
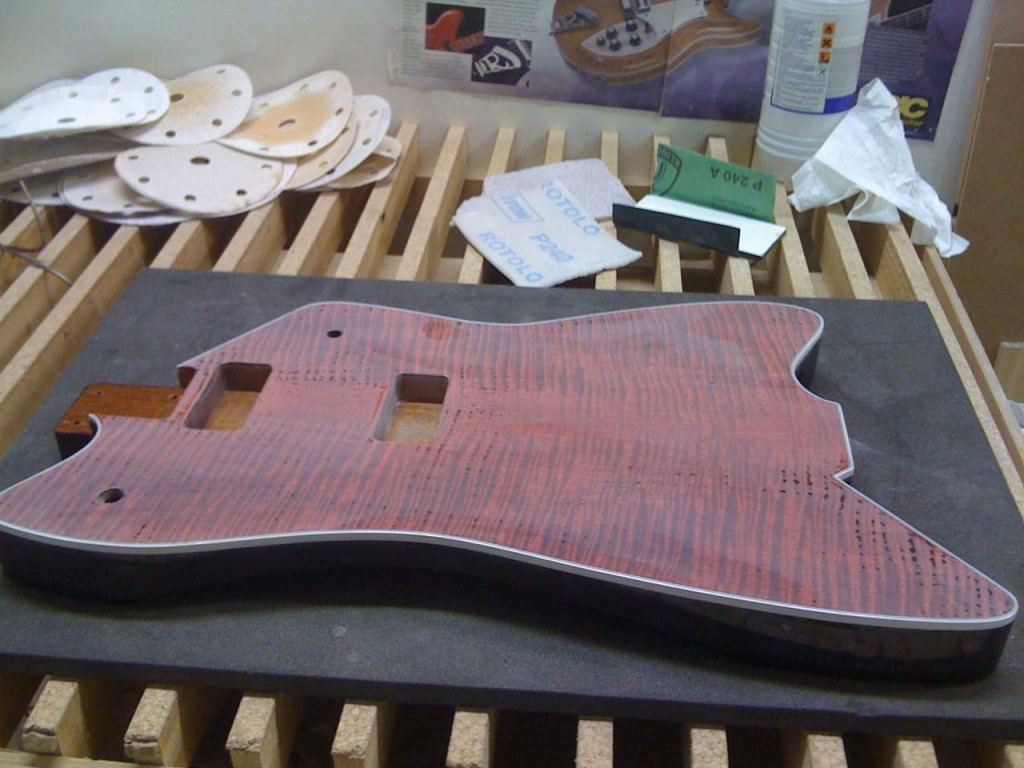
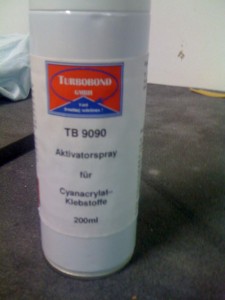
Sanding, sanding and sanding again, with P240 sandpaper. If there are “holes” in the lacquer, you can fill them with remnants of the paint fill (use a small nail or toothpick to put the lacquer on it’s place). Place the body under the UV lamp and sand again. If the paint can’t make the touch up (the hole is to big) you can also use super glue and a accelerator. In a drop of super glue, the inner of the drop will not harden but the accelerator will speed up this process. After a few seconds of spraying the accelerator over the super glue, you can sand it.
Day 19
Applying the last coat, PU (poly-uretheen) paint. This is sprayed in 4 layers with an half hour interval in between. Then the paint needs to harden one week.
Spraying PU is slightly more difficult than the UV lacquer. The paint must be sprayed sufficiently thick , but not too thick otherwise it sags.
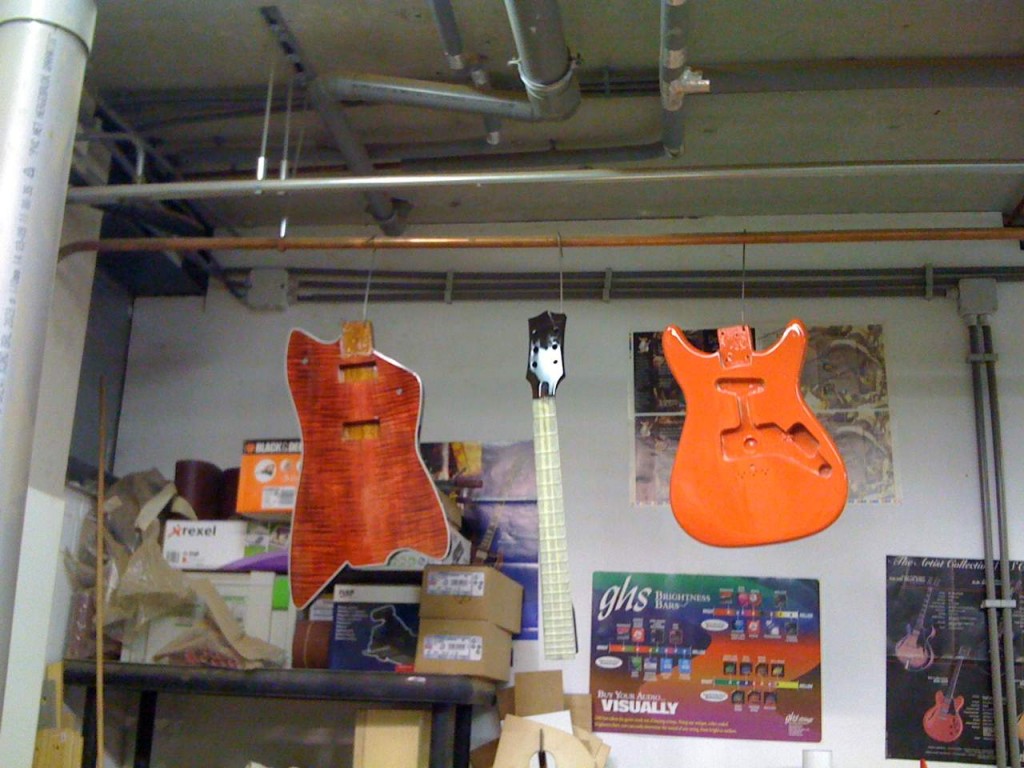
Day 20
Sanding the last coat. The paint had dried one week and was properly cured. Spraying went wrong in a few places.
- Too thick on the front at the edges. Here bubbles showed up in the lacquer. This was caused by paint that hardened at the top but not at the bottom. When sanding, these bubbles open and during polishing the (white) polishing material will get stuck in it.
- Same as above at the back in two places
- At the bottom it is even worse. The entire flat section at the bottom has bubbles and thereby caused a grayish result.
Now we must continue with hand-sanding. First use P600 to shape the body (sand away the sags). Use water to ensure that the sanding paper doesn’t clog up. It is a piece of sandpaper wrapped trespa so you always rubbing surface. It is a tedious job, it took me about three hours for the whole body.
Then sanding with P1200 with water. Now use a sponge to wrap the sand paper around. This allows you to guide the sand paper a little more. Sanding with P1200 must remove the scratches from the P600. When there are no shiny spots anymore, you can stop. This sanding goes faster because the body is already in shape.
Then sand with P2000, with water. This goes quite fast. Now that you sand the last scratches away, the body must be completely matte. If you put some water on the body, you can see what the body is going to look like. Cool!
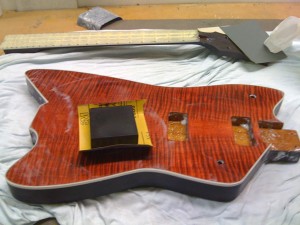
We also sprayed the neck back matte. Two short passes were sufficient. The front of the head was masked with masking tape which was removed around the edges with a sharp knife.
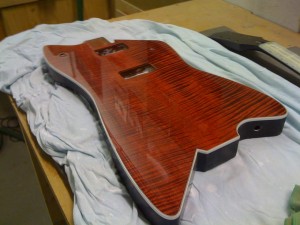
Day 21
Polishing the body. On a large polisher use first coarse and after that fine polishing. The coarse polishing (eg sanding with P4000) goes from left to right and from top to bottom repeated 3 times. Beware, the brush can exert a significant force on the pick-up holes and push the body out of your hands, so keep hold of the body firmly. Keep the body in such a way that the brushes hit the body from up to down. The body should be slightly tilted forward.
Polish the back also three times (left-right and top-down) and then the sides. The sides should be polished just once.
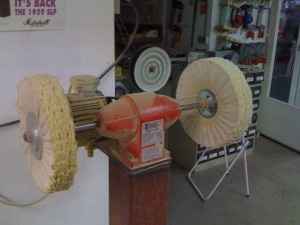
Then use the fine polishing brush for fine polishing. Once is enough. Then rub the whole body with anti-static (car) polisher to prevent fingerprints (and dirt).
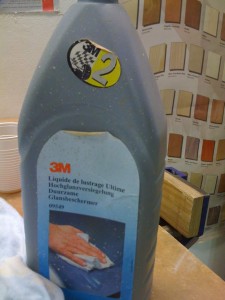
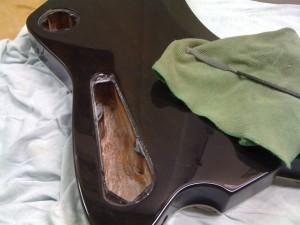
Now we have to drill holes for the potentiometers. Prick with a small awl at the correct location a small hole and then the drill on the stand drill with 7 mm drill (I use Japanese potentiometers).
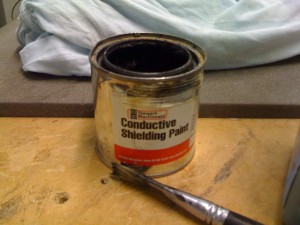
Sand the electronics cavity so the cavity roughens up. Then paint the cavity with shielding paint. Also remove the small bumps on the edges where the plastic cavity covers lie on.
Neck edit: first sanding the neck sides (at an angle of 30 degrees with a piece trespa P240) so that the sprayed paint and broke the tape can be removed easily. Remove the tap on both sides from the sides apart so that the smallest chance that with the removal of the tape takes paint well.
Then the fretuiteindes complete so that no sharp crackling longer sit (feel with your hands by going down the fretuiteindes).
Take of paint residue on the binding of a small knife.
Faces of the frets: first the neck with a ruler and straight trusrod make. Then tape by taping the neck between the frets to stick. Then with a flatter surface with P300 sandpaper the frets. Ensure that all frets hit, then they are all equal.
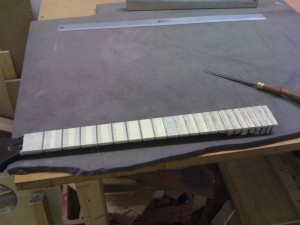
With a fret file again rounding up the sides. Not the tops! It is therefore a horizontal line on the frets can be seen, the frets may not fully completed. With P240 sandpaper then finish the frets by using two fingers very hard on the sandpaper and so pressing on the frets to go. This gives the final rounding the frets. Then scratches off the frets sanding with sandpaper P600 and P1000. Just remove the dust, and finally, the frets are polished.
Day 22
- Create and install utility
First remove imperfections (glue/paint residue) which goes best with a small chisel.
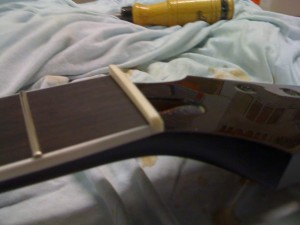
I choose to make a nut out of cooked bone. Though for guitars with tremolos, cooked bone is not always the best choice, the Bigsby only give small vibrato effects so the nut won’t be under stress that much. First some measures, the nut had to be 43.0 by 4.0 mm . With the sanding band, I sanded a piece of nut of this size.
Put the nut in it’s place and mark the contour of the fretboard on the nut. Do this by having a pencil run over the frets when drawing the contour with the point of the pencil on the nut. Everything has to be sanded away till on the contour. But leave a little more bone at the side of the low E. The nut will become a-symmetric. When sanding, make sure you sand straight, I used the sanding belt. When the nut is in it’s shape, you must round the back of the nut with the same sanding procedure as used for the neck. The final contour is made by sanding with P600, also sand the sides to give them nice rounded edges. Make sure there are no scratches any more.
Glue the nut to the neck with super glue (put two drops of glue on the ‘front’ of the nut on 1/3 of the width and put a thin ‘line’ of glue at the bottom of the nut).
Now the string slots have to be made. Mark the low E with a fine pencil at 4 from the edge of the nut and mark the high E at 3 mm. Then use the spacing-ruler (StewMac) to mark the other strings.
Measure the height of the frets by puting a piece of trespa on top of the frets and using feeler gauges to measure the distance from fretboard to trespa. Add 0.05 mm to this value and you have the height to which the fret slots have to be sawn.
I ended up with a height of 0.5 mm. Take your 0.13 file and carefully saw all the marks, then check with your space ruler if the distances are still OK. Any mistakes can be corrected now. Choose 0.5 mm with the feeler-gauge, put it on the fretboard against the nut and start sawing with the appropriate nut file until you hit the feeler gauge. Do this for all nut slots with files 0.13, 0.16, 0.xx, 0.28, 0.36. 0.46. Saw under an angle of about 20 to 30 degrees.
- Route pick-up cavities
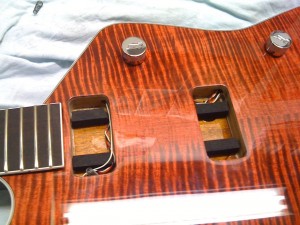
The pick-up cavities turned out to be too small, the pick-ups wouldn’t fit. We hmade a new pick-up cavity template to just route away that extra mm. We also sanded away a little bit of metal from the bottom of the pick-ups to make them fit better. - Drilling cable routes
As the previous nerve wrecking task, another one. With a very long drill, drill from on cavity to the other for the cables. Sander did it for me, I couldn’t watch. - Soldering electronics
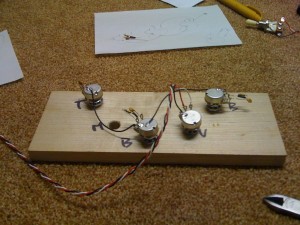
Its makes life a lot easier when you use a kind of soldering mold for soldering all this tiny wires. Except for the wires of the pick-ups and the jack plus, everything was ready. The jack plug cavity had to be made wider with a rasp (always rasp ‘away’ from yourself to avoid damaging the lacquer).
- Mounting neck
Because I wanted to bring the unfinished guitar home, We mounted the neck. Without any lacquer, the neck only just fitted. Now with lacquer it doesn’t fit. By removing lacquer in the corners of the neck pocket, the neck would fit but with a slight deviation to the right. When screwing the neck onto the body we took care of this. Someone kept the neck under a straight angle when we were putting the neck screws in. The body was first pre-drilled and after that a 3.4 mm drill was used. With a piece of tape we controlled the depth when drilling.
Dag 23
The course is almost at its end. What has still to be done:
- Install pick-ups
Install the pick-ups and make two small holes with an awl through the pick up intsall holes . Pre-drill the holes with a frill that is about 0.8 the width of the screw (in this case 2 mm). Drill straight otherwise the screws not run perfectly vertical and the pick-up will be pulled between the screws.
Ubner the pick-ups put two pieces of insulation foam and below the screws a little spring so the pick-ups are pushed upwards. This makes adjustments easier.
- Mount bridge on body
Plak afplaktape op de body waar de brug moet komen.
Meet afstand van nut naar 12e fret en meet teken deze afstand af van de 12e fret. Doe dit op de hoogte van de hoge e-snaar. Leg de brug zo dat de hoge e-snaar precies op het afgetekende punt komt maar de lage E-snaar 3 mm naar achteren valt vanaf dit punt gerekend.
Prik de boorgaten voor de brughouders voor met de kleine priem.
De gaten van de houders van de brug waren mm, de houtboor was slechts mm. Met de mm houtboor zijn de gaten geboord, daarna met de iets grotere mm metaalboor nageboord. - Do not forget to install the bridge grounding wire to the bridge socket to run. This string must be an earth ground (bottom pot) soldered. Drill a hole from the bridge element to the room where space Coming up a container bridge to come. An electric wire with some unprotected copper is now the area where the bridge will be laid confirmation.
- Bigsby termolo positioning and installation
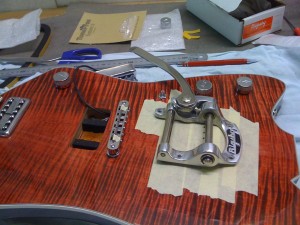
Paste the body part with afplakplakband. Place the Bigsby on the correct place, check that the strings run properly using a long ruler. Then the holes of the Bigsby prick with an awl. Drill holes can be drilled by hand. Go back out of a drill of 0.8 times the diameter of the screws.
- Stringing the guitar
Another tip from the master. Attach the string to the tremolo. Lay the string on the nut and pull it through the hole in the tuner. Hold the string with one hand on the tuner and keep the other hand at the middle of the string. Pull the string in the center up to a height of 10 centimeters.
Bend the string at the tuner in a ‘Z’ so there is a ‘nick’ in the string. Turn the tuner (keep the string with the other hand in the middle under tension) and make sure that the first winding above the ‘nick’ and all other windings get under the ‘nick’ . Now the string is caught between his turns. In the ideal case, you have three turns below the ‘nick’. - Neck adjustment
Quick check, keep the high E key at the first and last fret. Look at the 7th fret or a little space. No room => neck straight, turn the trusrod looser.
Too much space, trusrod too ‘loose’. Turn the trusrod tighter. Do it in small turns, a quarter turn is sufficient. - Intonatio
For the intonation, the pick-ups had to be connected. After soldering, testing, re-soldering etc. it turned out the jack-plug was broken. Sander got a new and better one and the guitar did roar!
Intonation via a Korg Buzz Feiten tunes. First tune the open string, adjust the tuner to ’12th fret’ and hit the 12th fret. If the pitch too high adjust the bridge saddle to the back, otherwise to the front.
Tuning is easiest when the volume pots are wide open! - Covers
A piece of plastic pickguard (black, 2.1 mm thick) covered with masking tape. Mark the contour of the cover plates on the masking tape. First saw the outline with the band saw, then with the sanding belt to adjust exactly to the outline.
Try to fit the cover regularly. If the shape is correct, then a sand a decreasing angle on the sides.
Then punch the holes for the screws (5 mm from the edge). These holes with a metal drill. Then with a sovereign space for the screw to make.
Place the template with the holes in place and the prime spots where the screws come. Drill holes for the screws.
Day 24
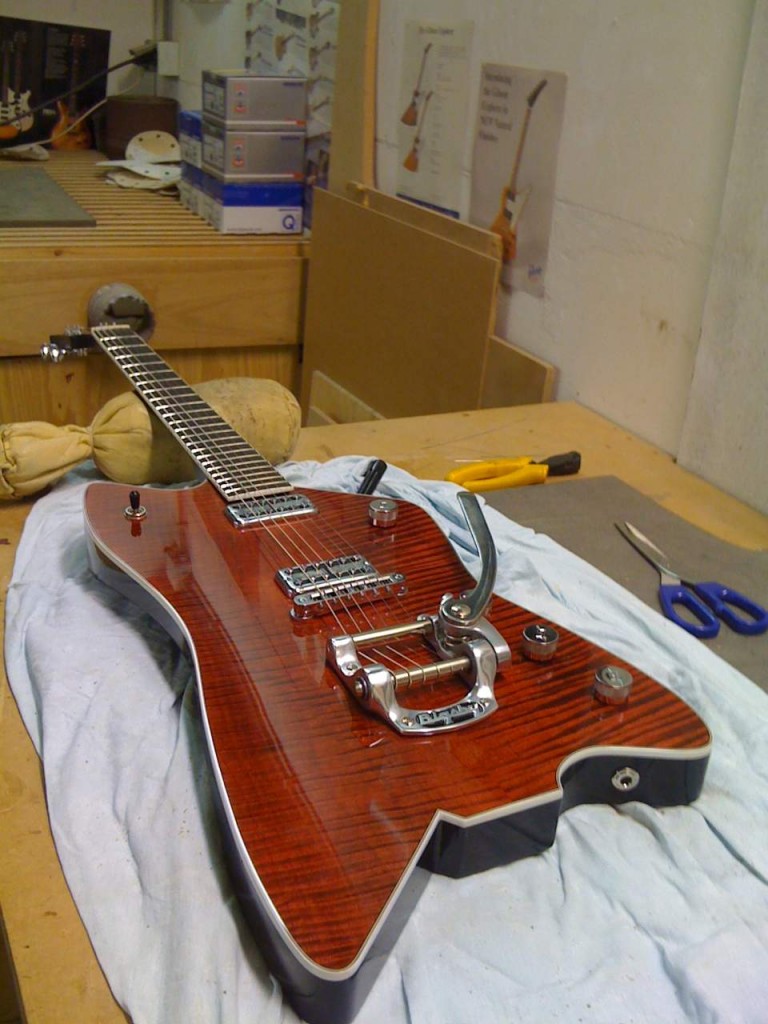
Total price of the completed guitar:
| Description | Dollars | Euro’s |
| 24 lessons of 100 euro | 2400 | |
| Flame maple top | 160 | |
| Mahonie body/necks | 60 | |
| Binding | 15 | |
| Ebbenfretboard (2 times) | 80 | |
| Frets | 8 | |
| Truss rod | 10 | |
| UV lacquer | 40 | |
| Nut | 10 | |
| Neck inserts | 5 | |
| Potentiometers | 14 | |
| Jackplug | 7 | |
| Plastic covers | 4 | |
| Strings | 6.50 | |
| Backplates | 4 | |
| Screws | 2 | |
| Tonepro bridge | 62.50 | |
| Buzz Feiten licence | 60 | |
| Guitar bag | 25 | |
| Tuners | 90 | |
| Bigsby tremolo | 130 | |
| Buttons | 18 | |
| Pick-ups | 260 | |
| Customs | 67 | |
| Discount 10% De Gier | -57 | |
| Total | 3364 |
And worth every penny!
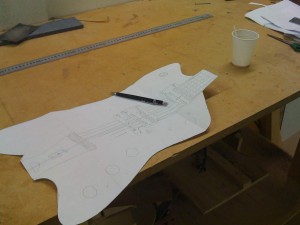
Heb vol bewondering je verslag van de bouw bekeken en gelezen. Ik wil zelf dit jaar ook een poging doen om een Billy Bo te bouwen. Ik zag op een van je foto’s een bouwtekening van de body. Heb je die zelf eerst gemaakt of zijn dat soort tekeningen ergens te vinden? Misschien heb je een tip hoe ik hieraan kan komen?
Jouw versie zou in ieder geval niet misstaan in Billy Gibbons collectie…
Groeten,
Rob
Hoi Rob,
Bedankt voor je reactie. Het is inderdaad een beauty geworden. Ik ben niet vanuit een bouwtekening gestart maar heb een plaatje van internet genomen waarop de gitaar zo recht mogelijk gefotografeerd is. Dit plaatje heb ik tot ‘live size’ uitvergroot. Truukje dat ik hiervoor gebruikt heb is om de nut naar 12e fret afstand te meten en dit te vergroten naar 24.75/2 inch (dat is 31,43 cm). Met het gratis tekenprogramma inkscape kun je dat eenvoudig doen. Vervolgens kun je de body op ware grootte uit laten printen bij bijv. een printshop. Op basis van de print heb ik de MDF mal gemaakt die vervolgens weer als basis diende bij het frezen. Er zijn ook bouwtekeningen beschikbaar op internet maar je bent zo $25 kwijt.
Het is een leuke gitaar om te maken. Heb je al ervaring met gitaarbouw? Er zitten namelijk wat tricky zaken in het ontwerp zoals de rechte hoeken aan de onderkant. Ook de ’tilted neck’ (hals onder een hoek tov de body) is best een lastige.
Groet,
Edwin
Hallo Edwin,
Bedankt voor de informatie. Ik ga je methode uitproberen (ik had wal wat hi-res foto’s gevonden). Ik krijg hulp van een houtbewerker die al vaker gitaren heeft gemaakt, die zal zeker je verslag smakelijk verorberen… Ik ben nu nog eerst op zoek naar mooi hout voor de body. Mocht ik tegen gekke problemen aanlopen, dan kan ik je misschien nog eens een vraag stellen?
Groeten,
Rob
Hoi Rob,
Natuurlijk mag je altijd vragen stellen.
Voor het gemak heb ik nog de originele Nederlandse tekst van het cursus ‘dagboek’ geplaatst. Je vindt het hier:
https://edsguitarlounge.com/wordpress/?page_id=645
Dat is wat makkelijker dan de engelse tekst.
Veel succes!
Ed