My EVH Hohner tribute
As in a previous post mentioned, I got myself a new headless Hohner guitar. I already had one in HSS configuration and I found a similar model second hand in HH configuration.
I completely had to “rebuild” this guitar. The previous owner had removed the zero-nut and put in an ugly white plastic nut that was originally meant for an acoustic guitar. Also the guitar was painted white by hand so I had to strip to the bare wood.
After finishing the guitar in a metallic red color, I noticed that the transparant lacquer started to crack. I think because when I sprayed the guitar, it was too cold. I’m also afraid that I started to soon buffing the paint, not giving it enough time to settle.
Anyway, the finished guitar looked ugly but was also almost unplayable. I had removed the white nut and replaced it with a black nut that would go better with the overall look of the guitar. But I couldn’t get the action correct.
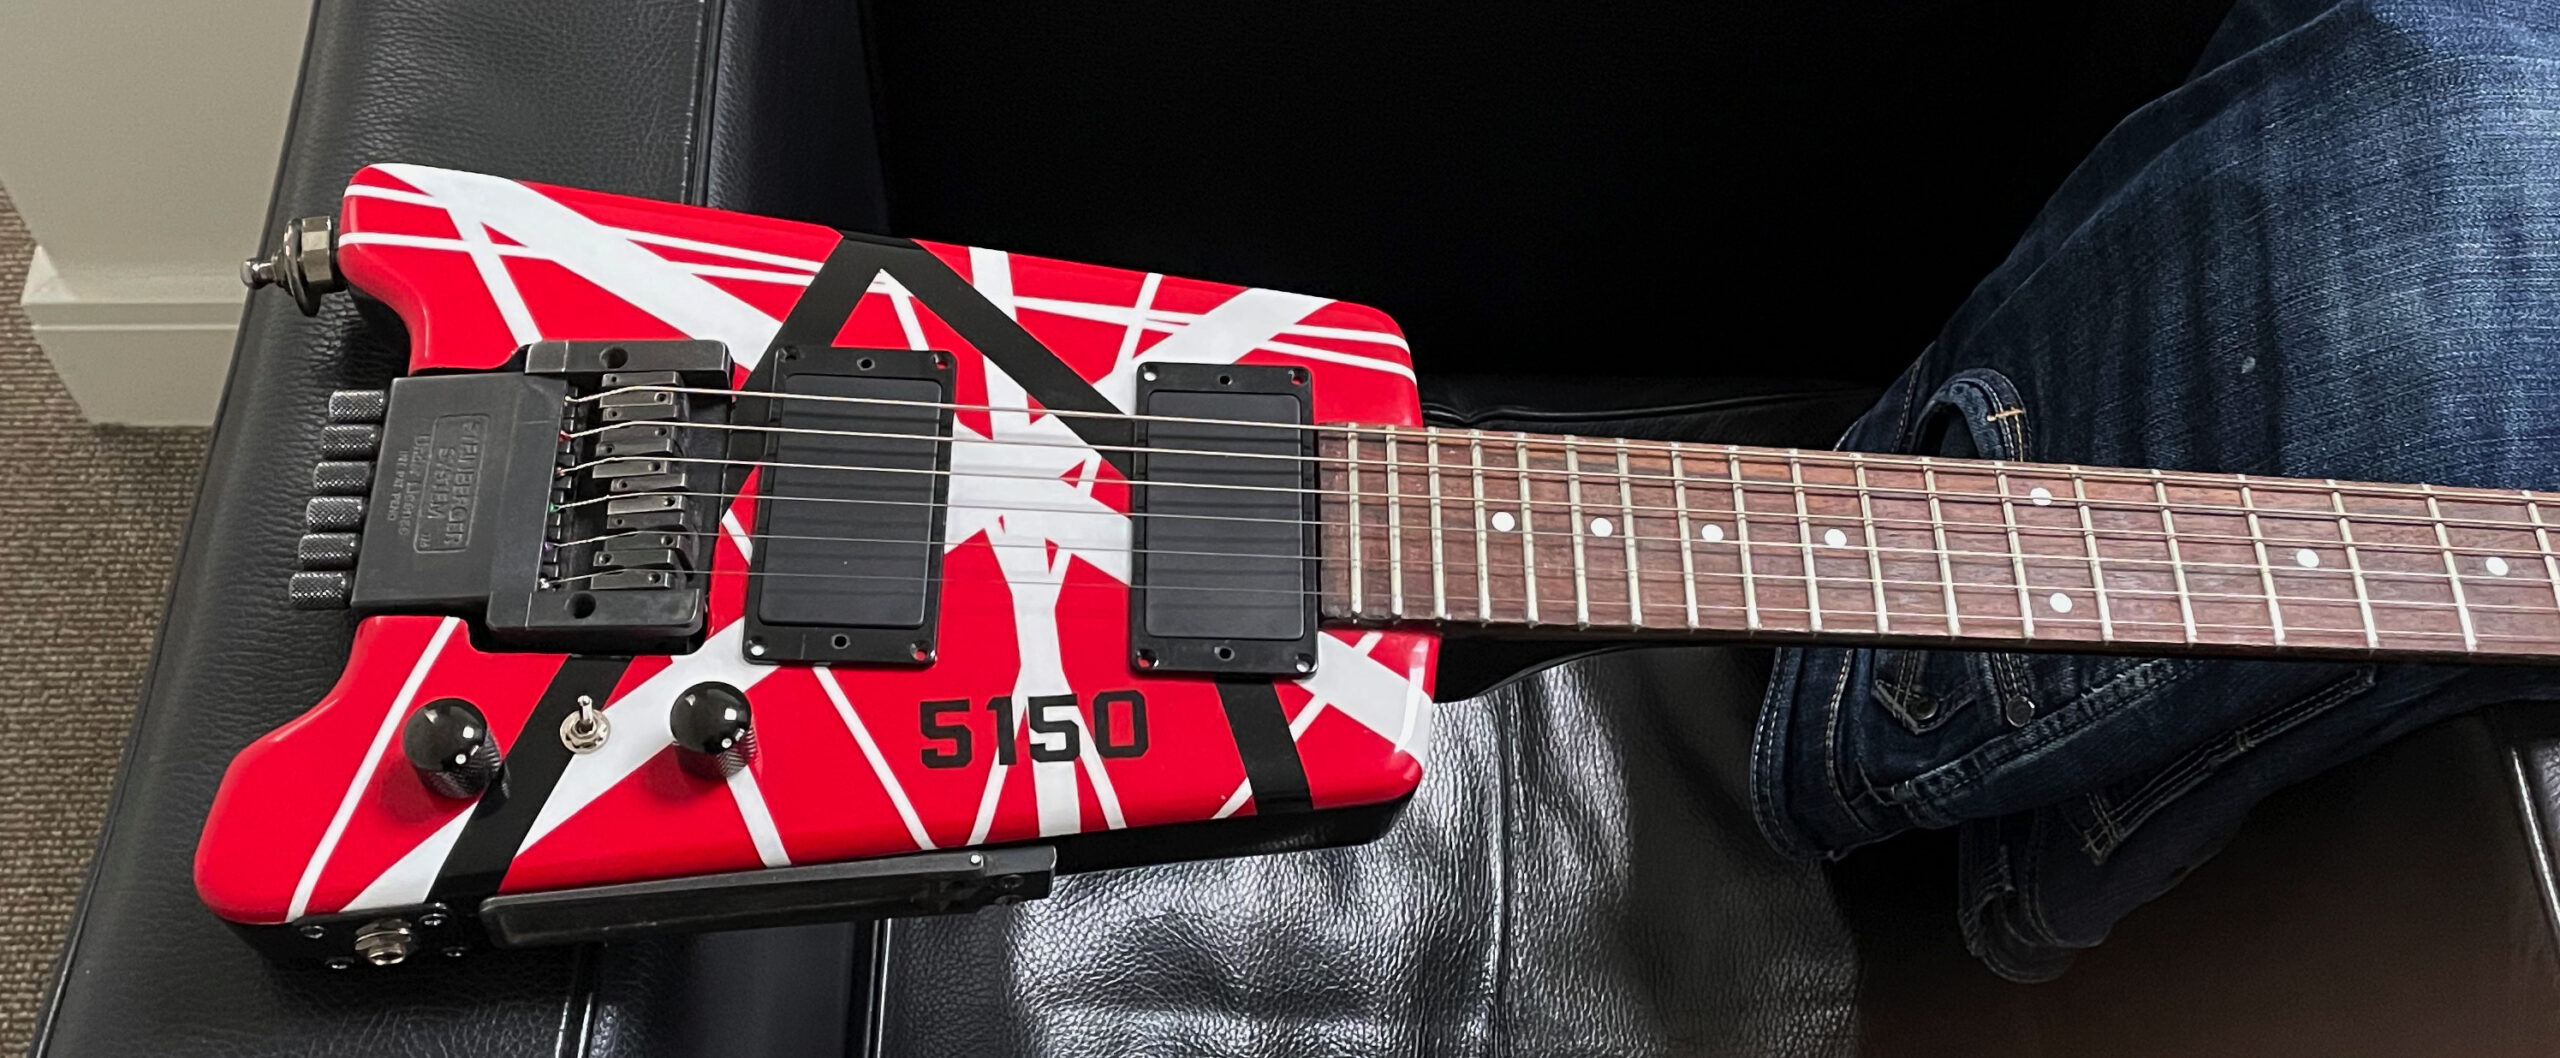
After a while, I found a replacement headpiece for the headstock and I decided to install that on the guitar plus doing a complete repaint. And indeed, the paintjob would be the famous EVH stripes, an exact copy of Eddie’s guitar.
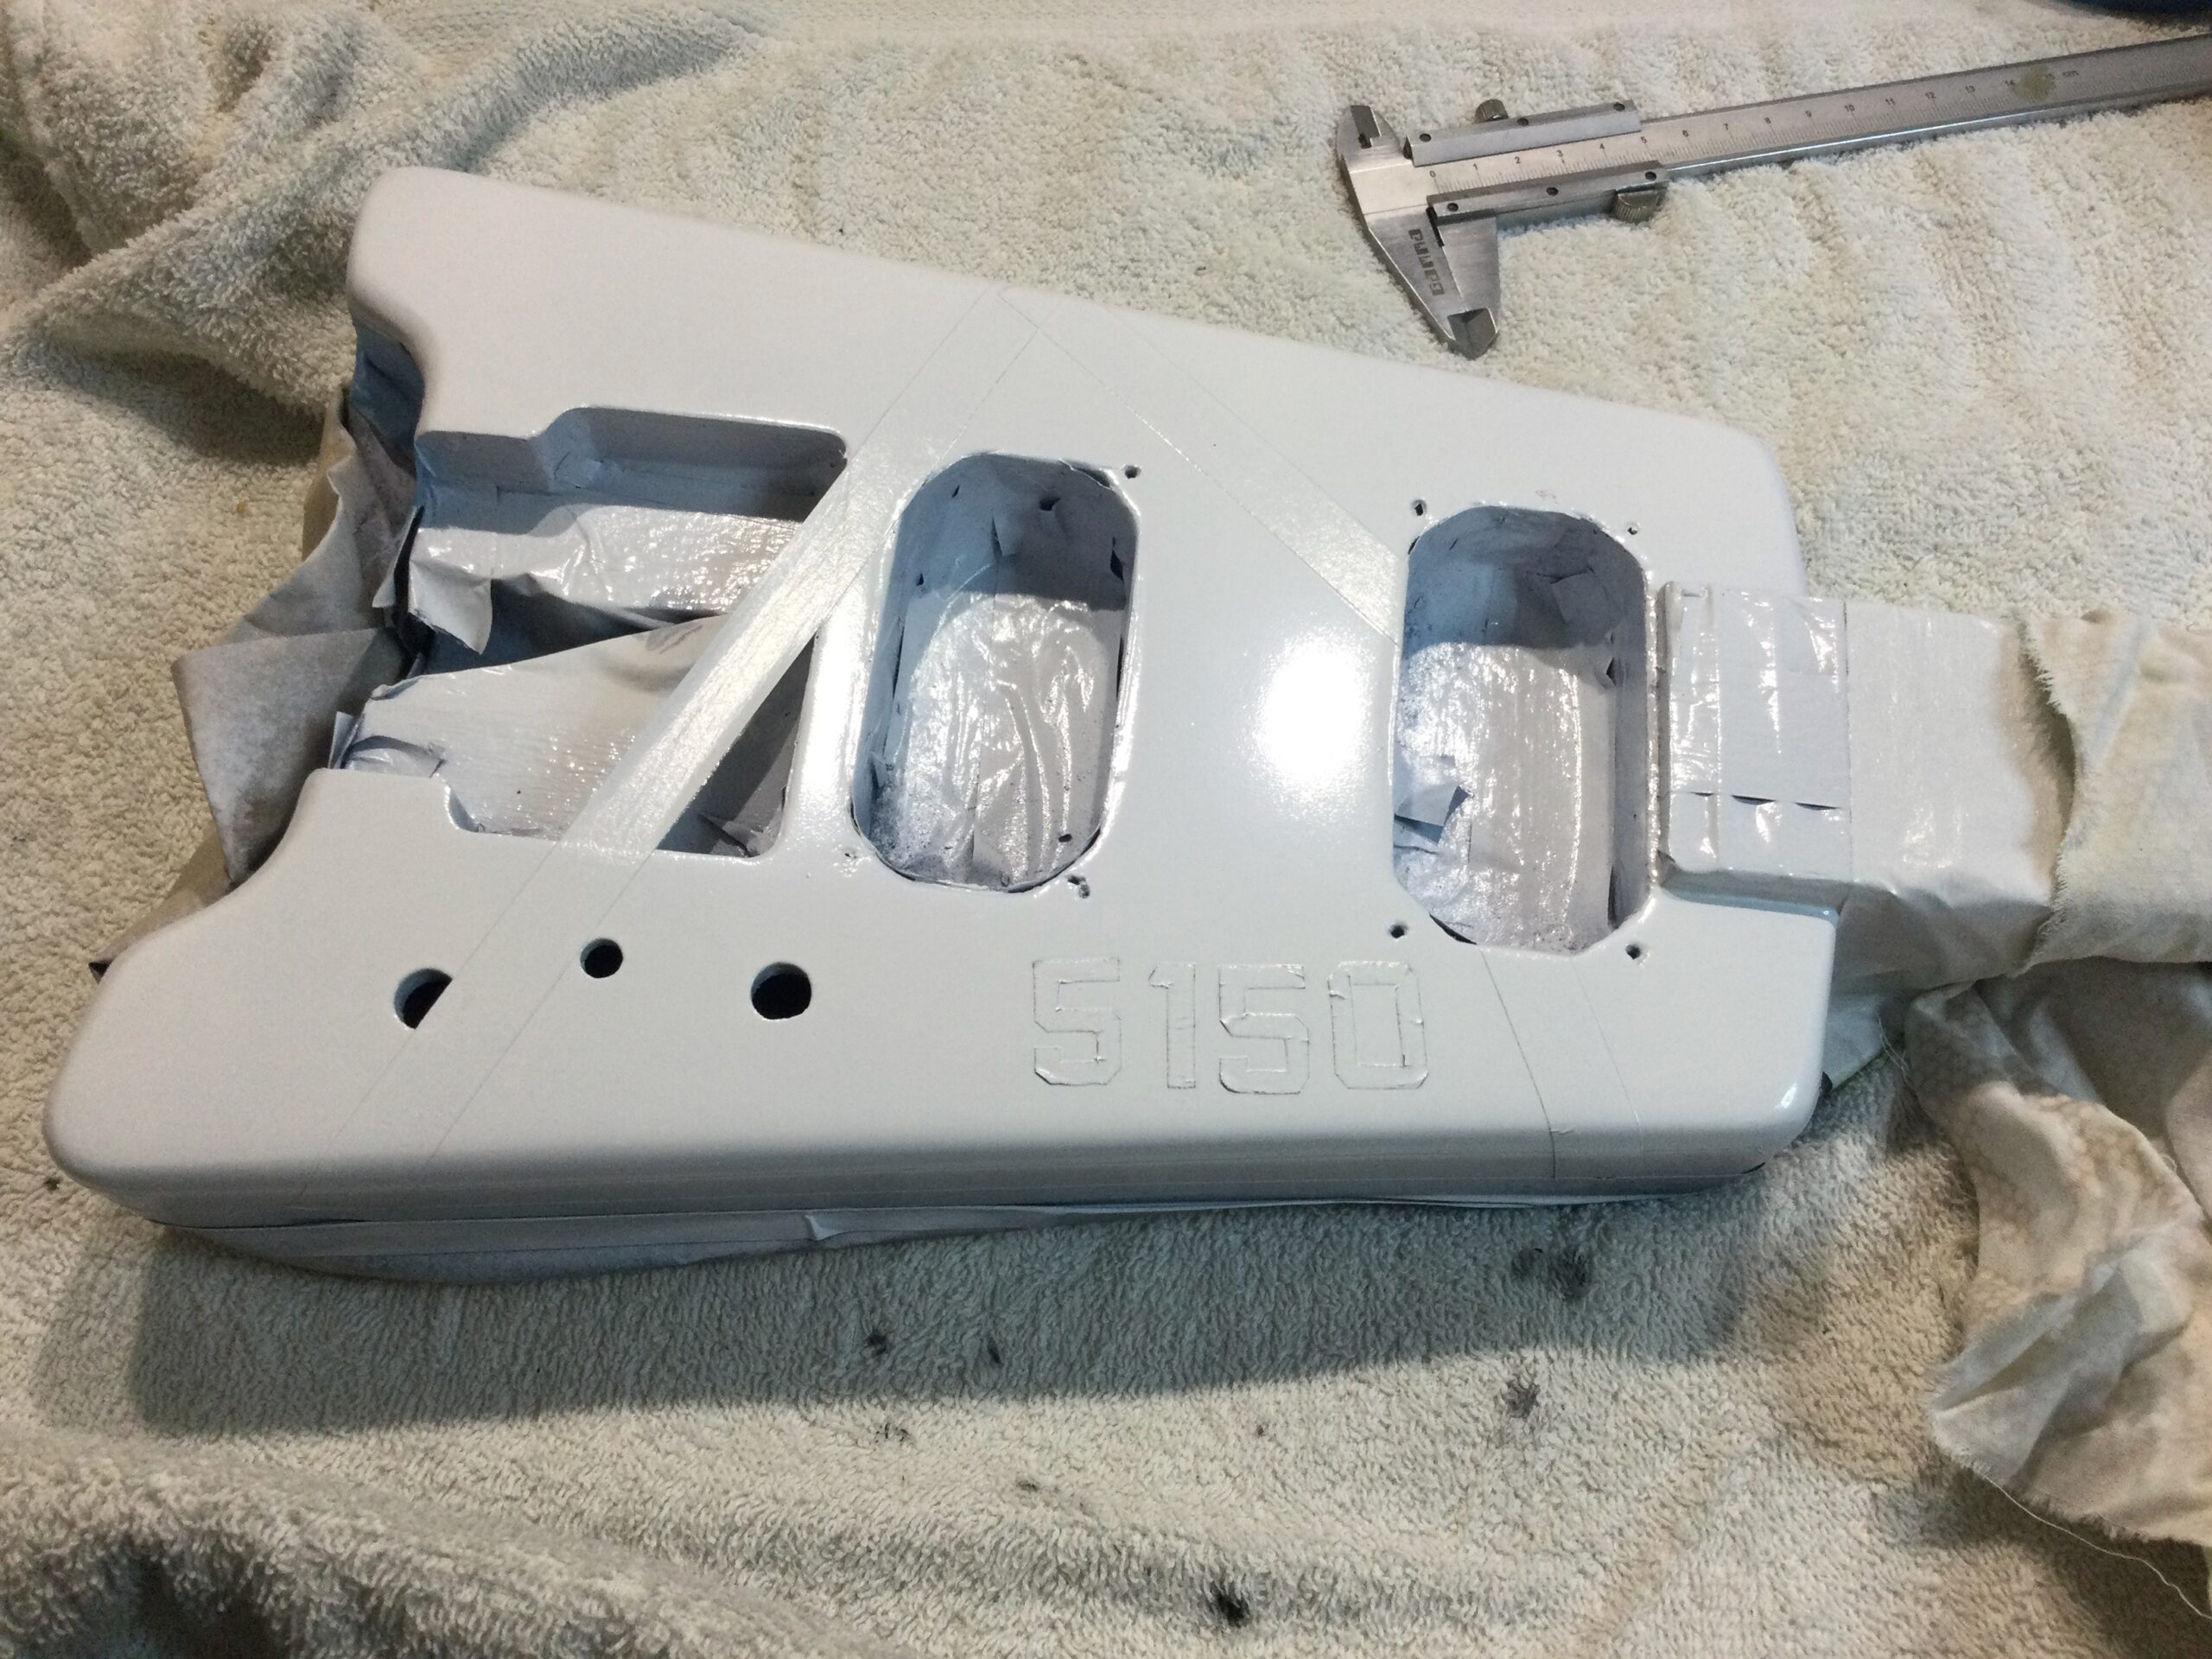
But how to approach this because I also wanted the “5150” numbering on the body?
The initial idea was to spray paint the whole guitar black including the neck. Then mask all the black stripes including the “5150” lettering. Next step would be to paint the top of the body white:
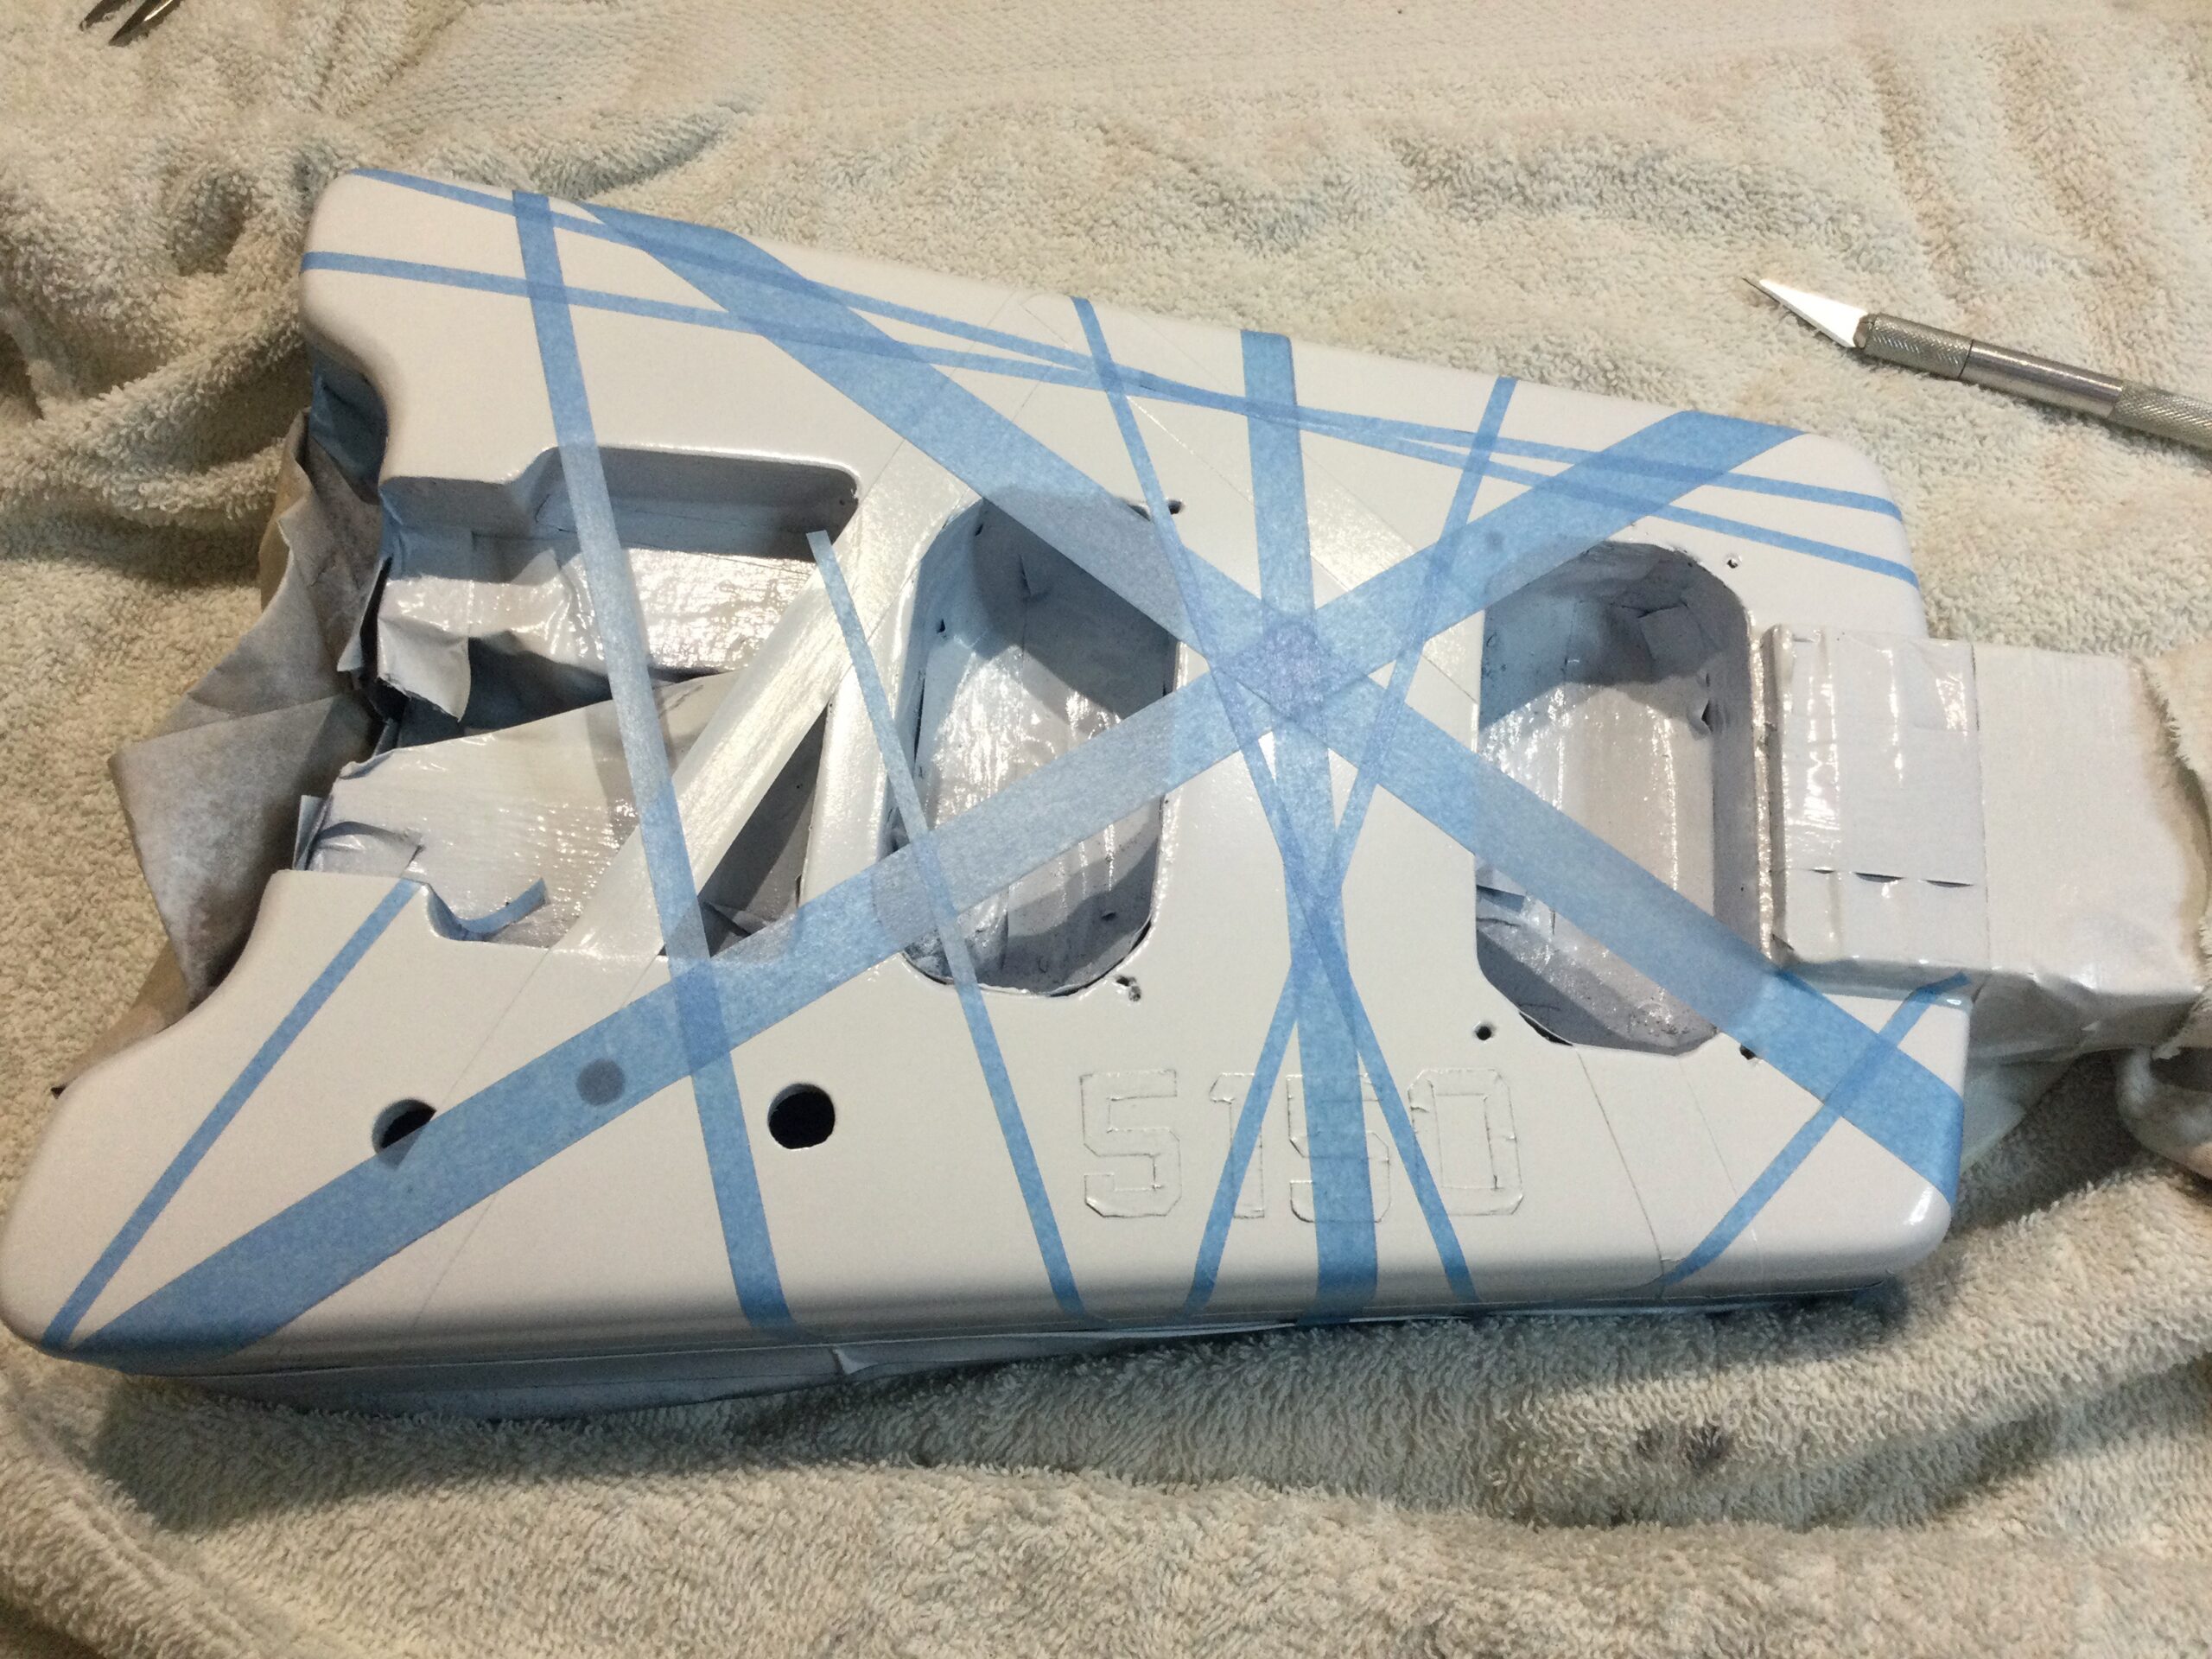
Pro-tip: before continuing with the next color, after masking spray again with the previous color. This layer will settle under the masking tape and will result in very crisp lines when removing the masking tape.
Next step was to apply the masking for the white lines, spray an extra white layer, and then spray the red layer.
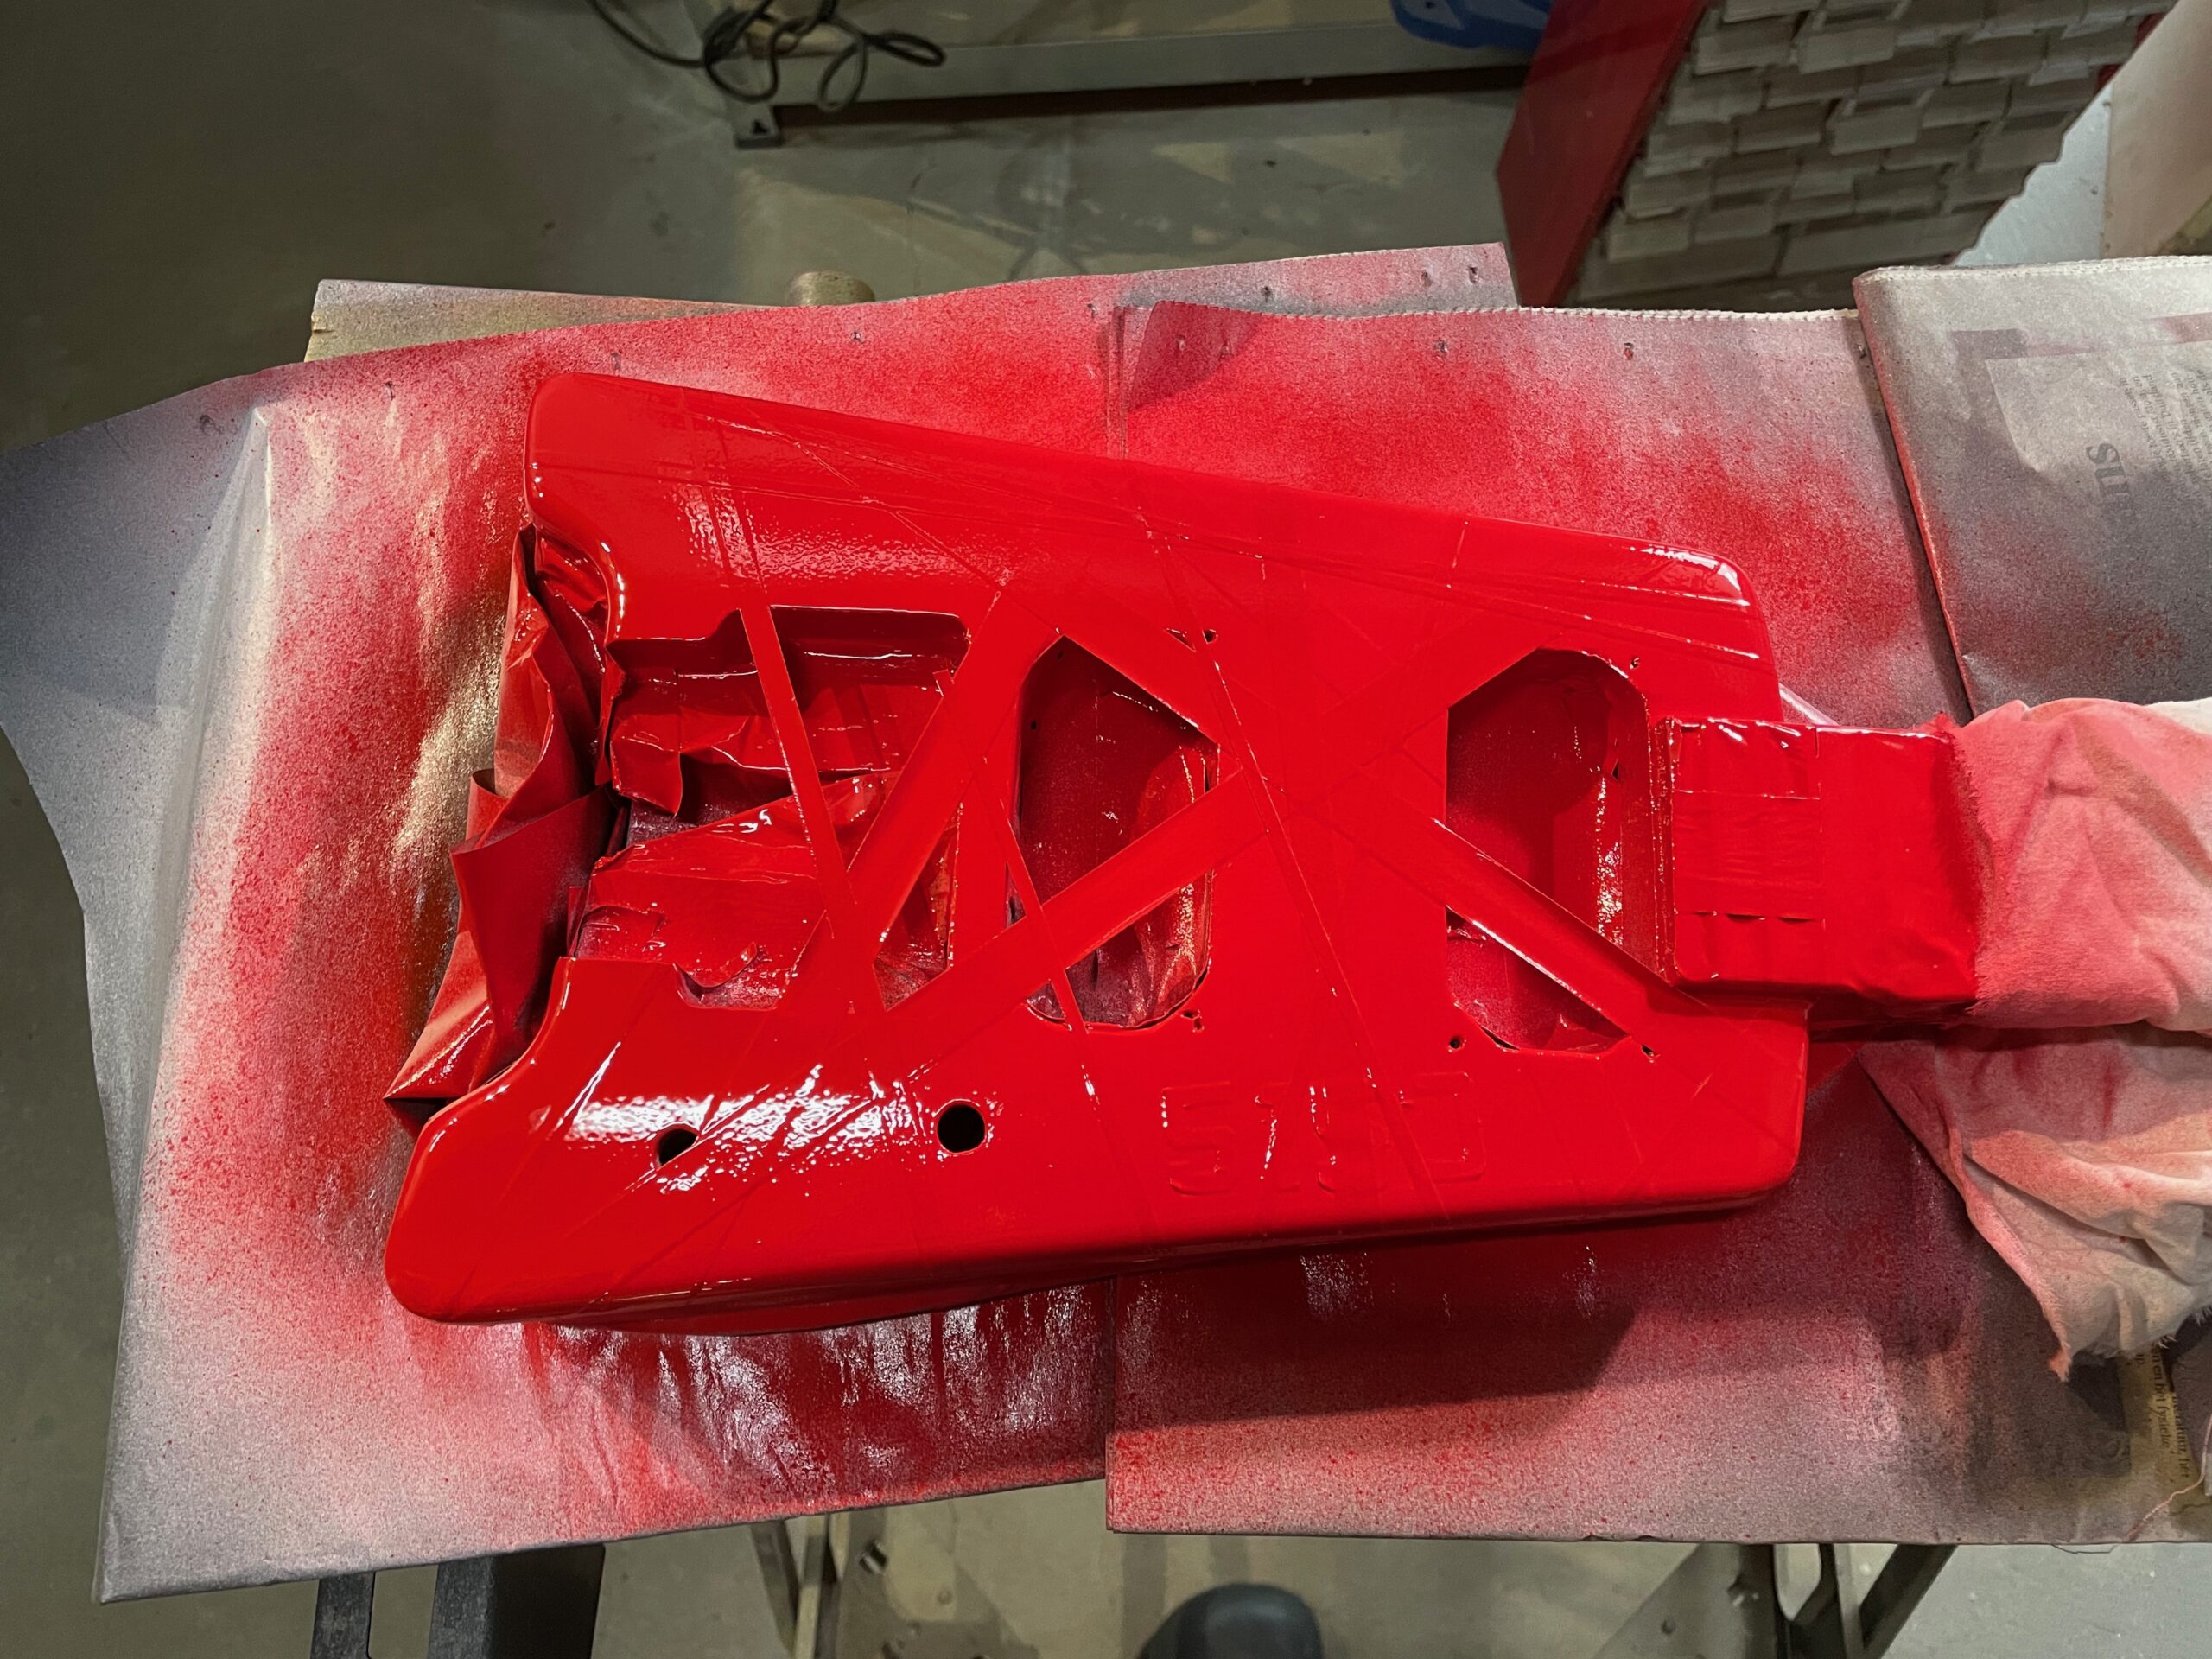
After removing all the masking I wasn’t to happy with the “5150” lettering. The numbers weren’t as crisp as I wanted them to be.
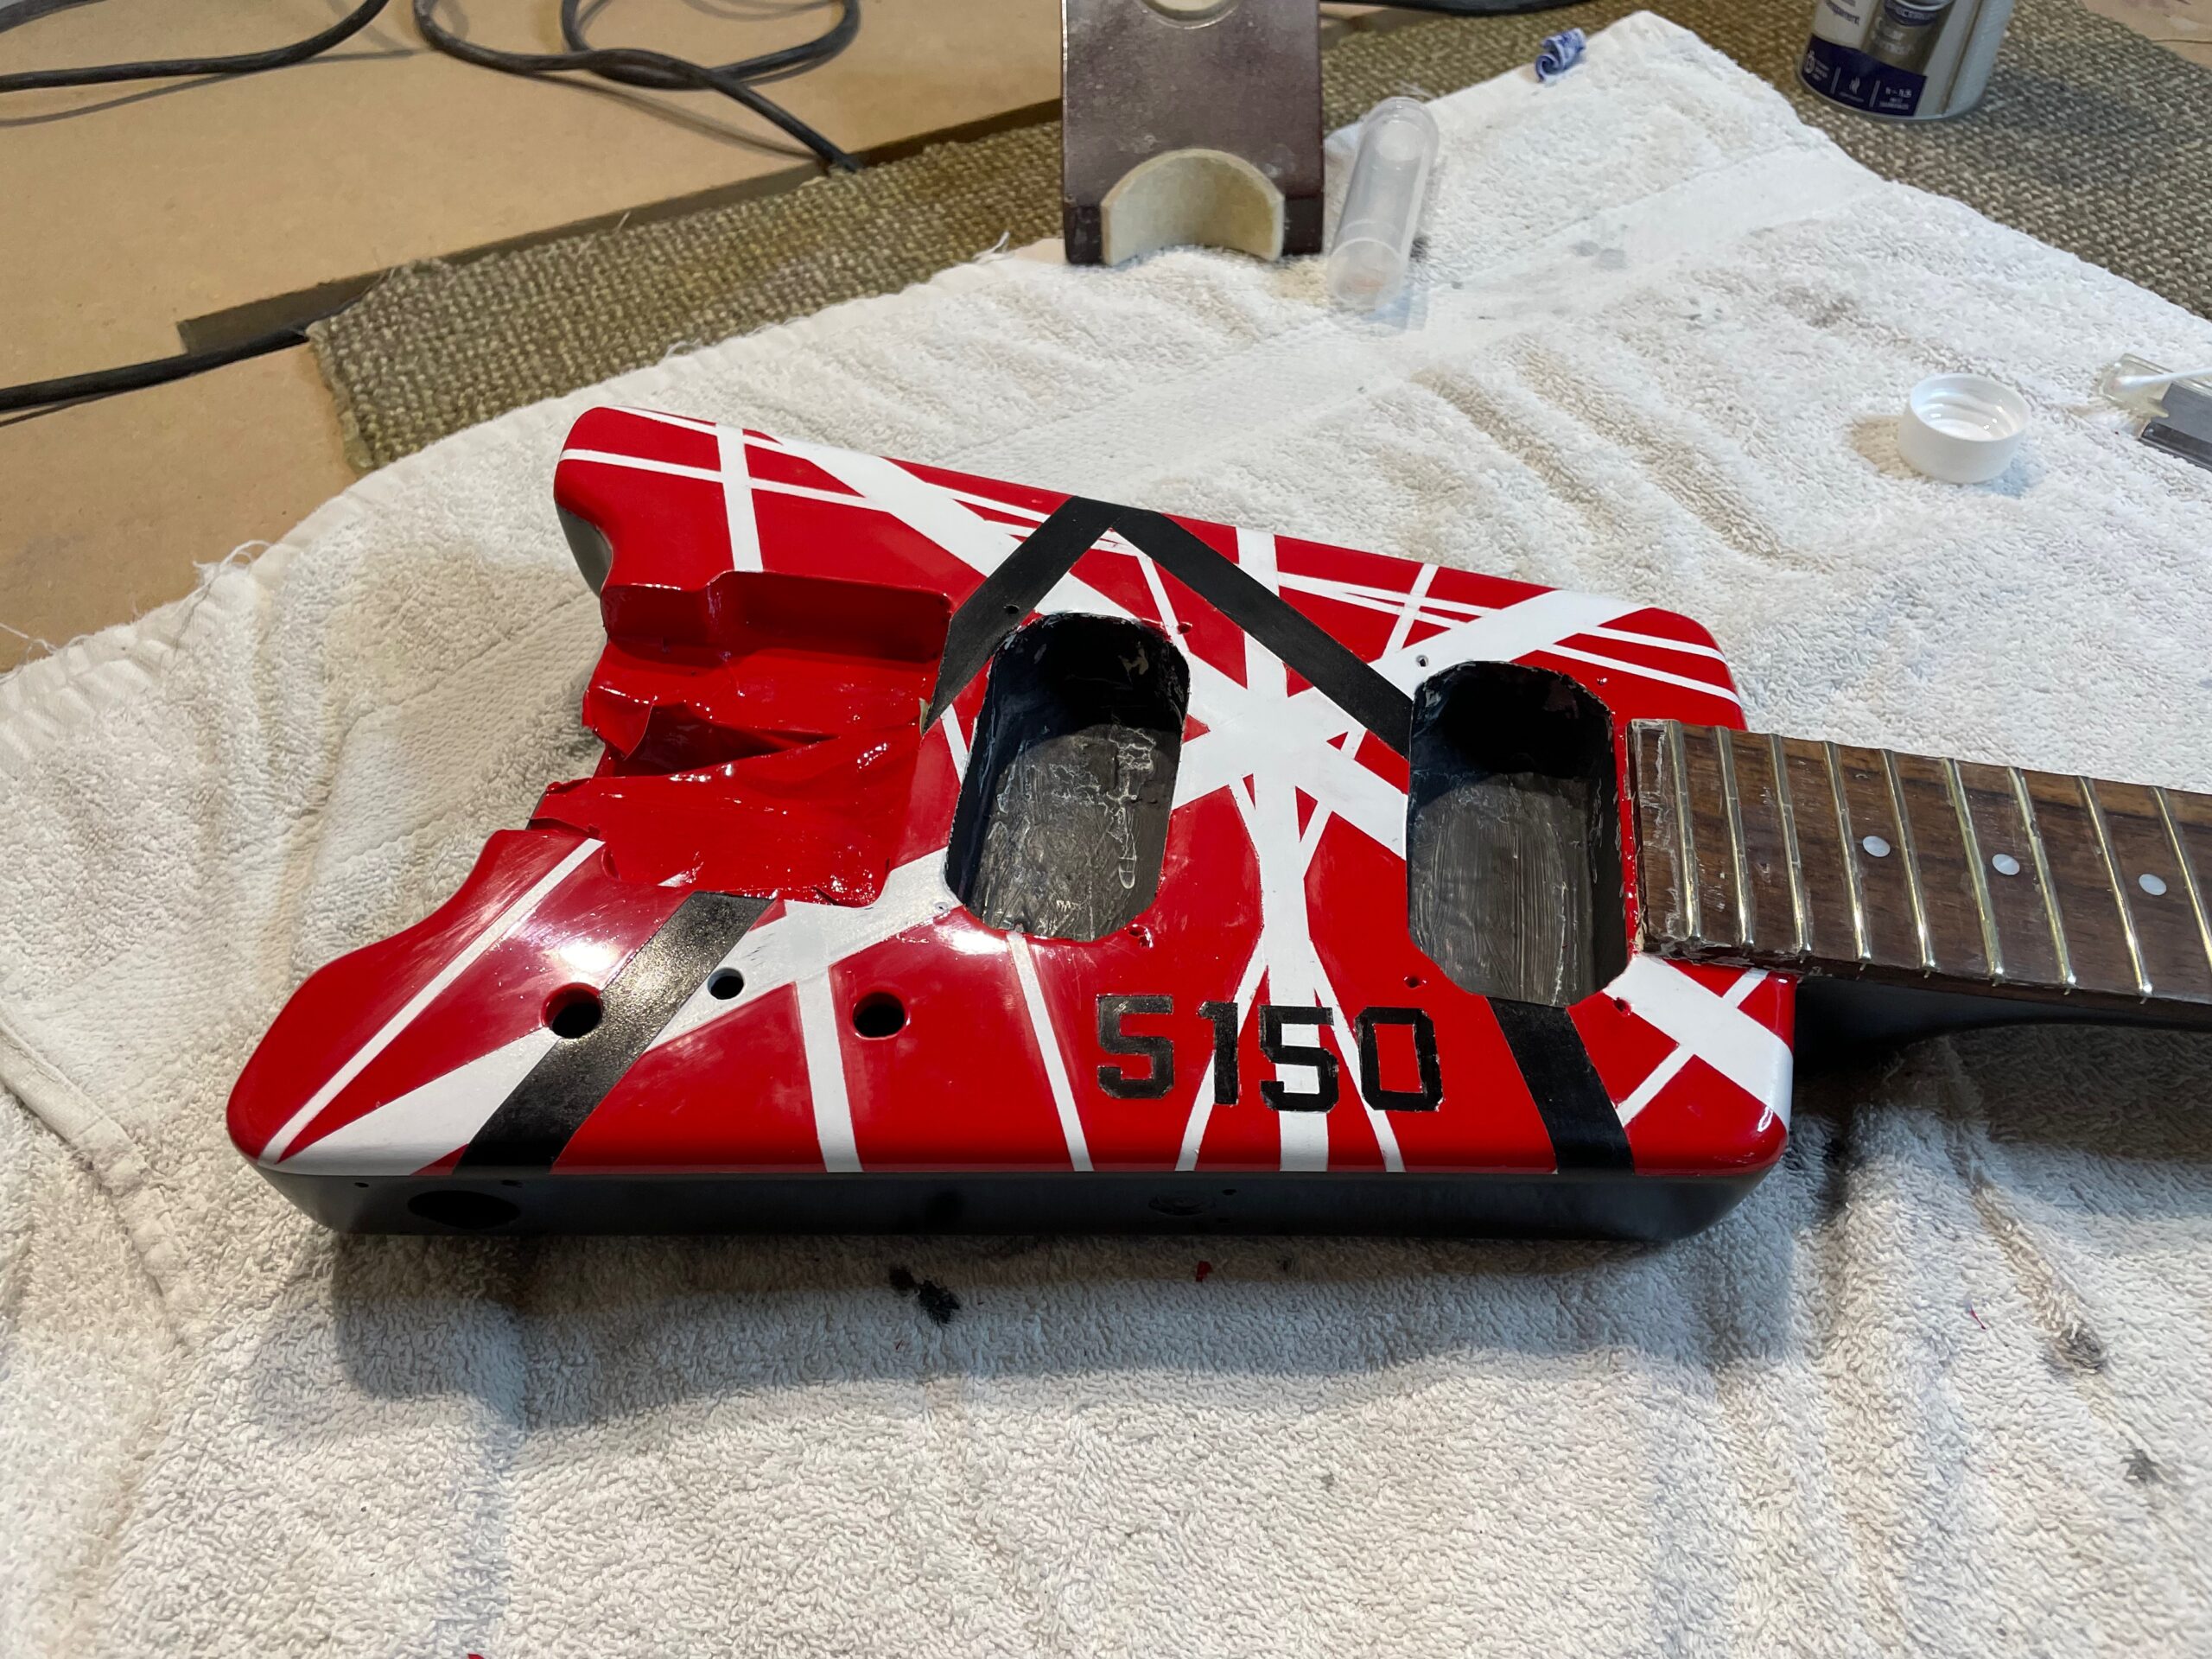
So I decided to start all over again, but now apply the “5150” as a decal. I used Avery clear shipping labels (L7567-25) for printing the decal.
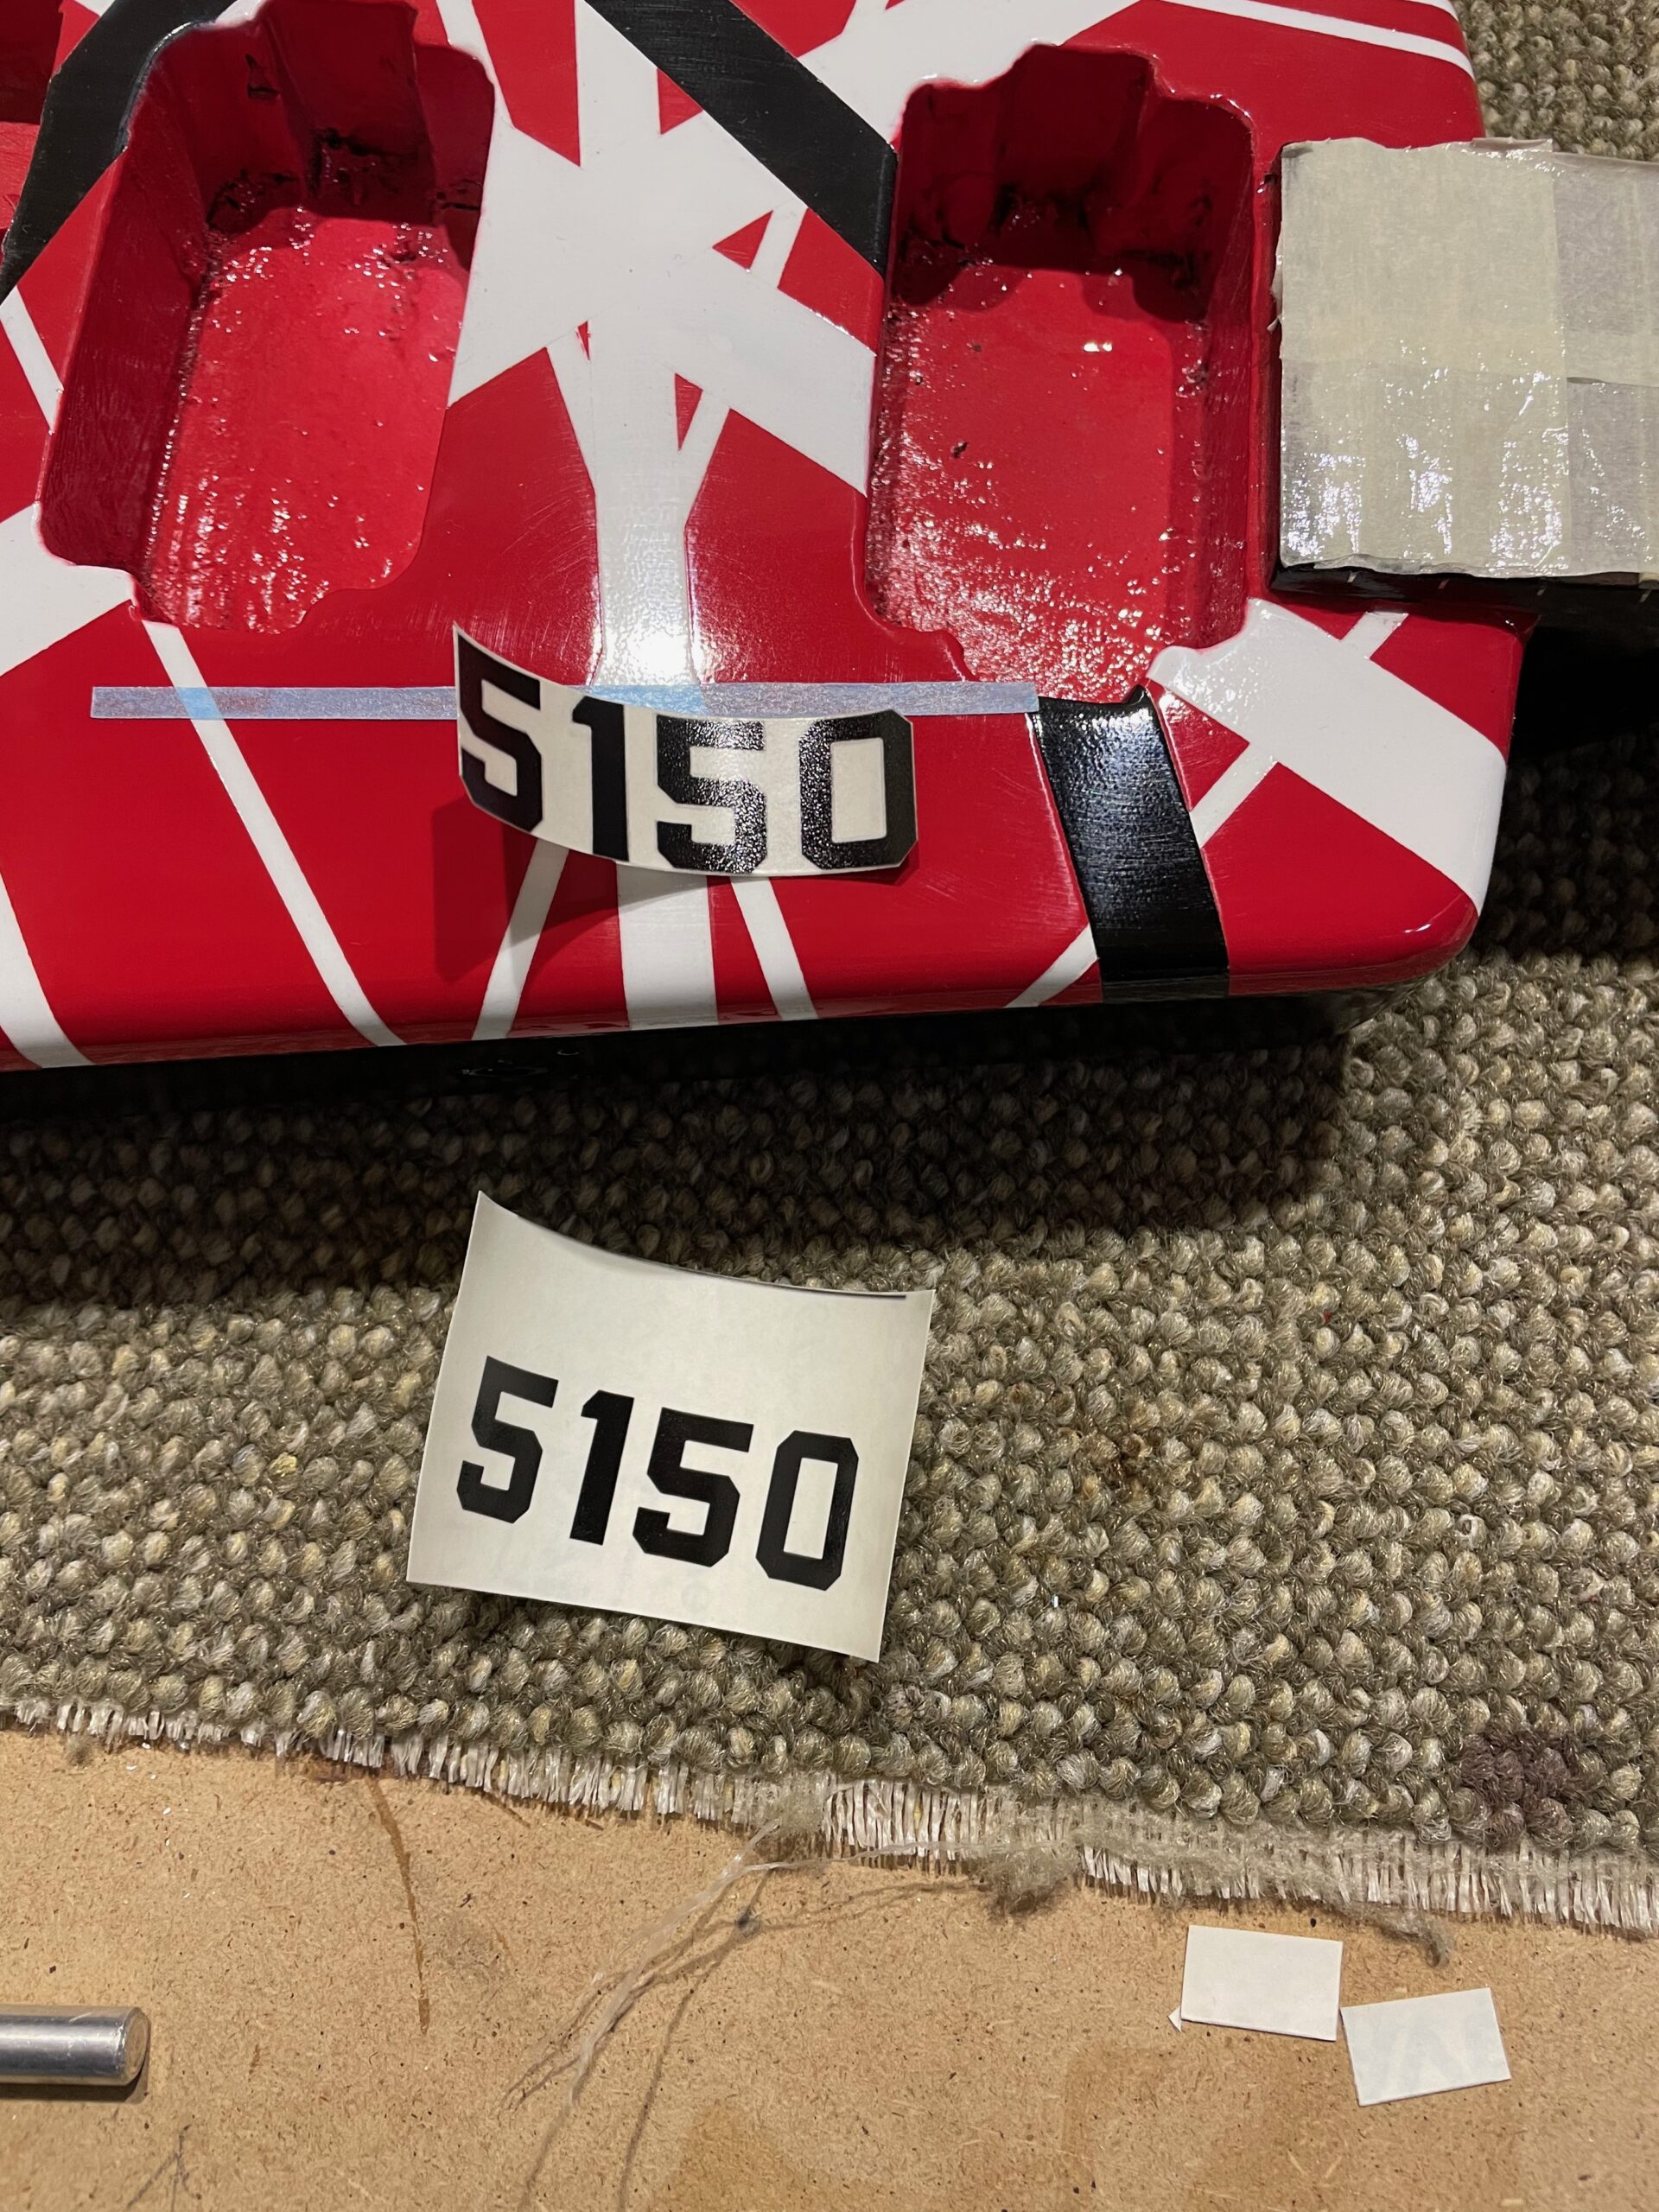
This worked great. Next step was to apply clear coats, sanding and buffing the clear coat and putting all the hardware and electronics in.
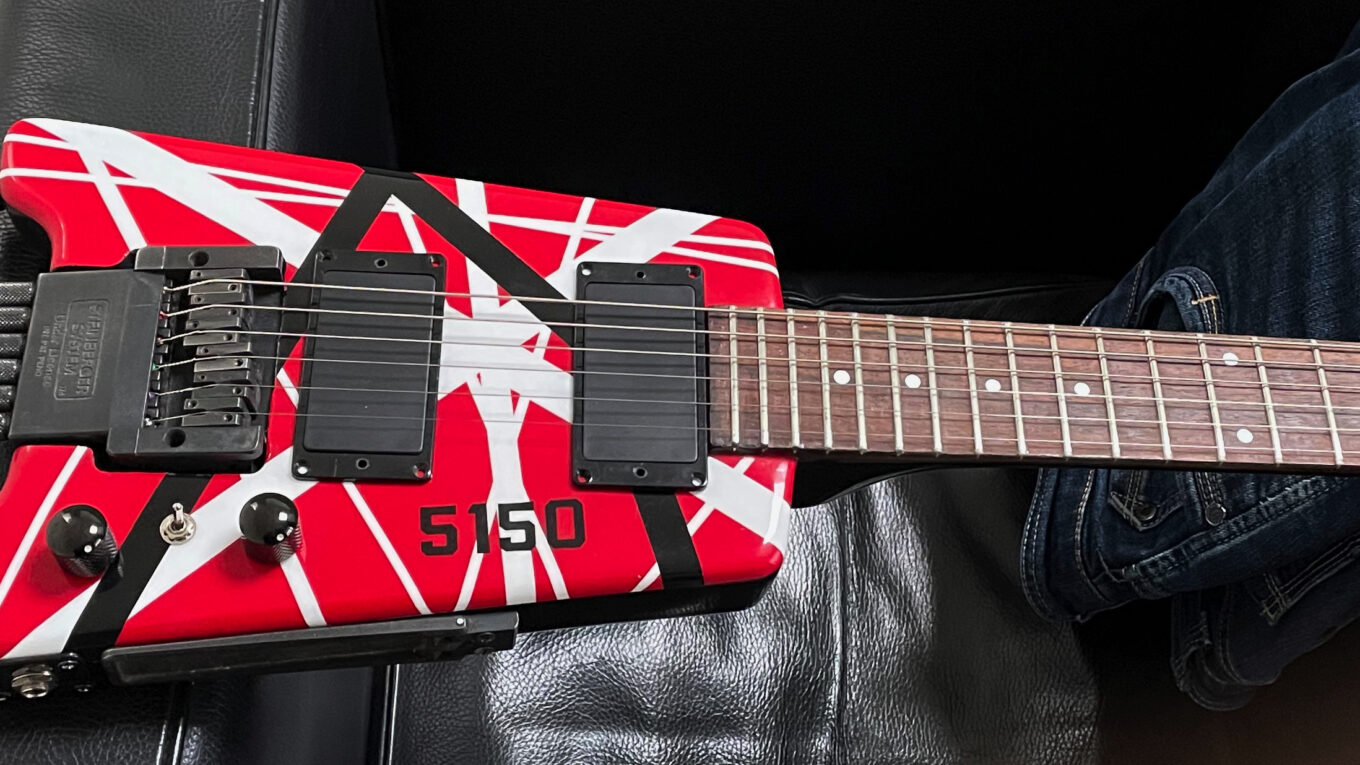
To “simulate” the EMG pick-ups, I used complete solid hum bucker pick-up covers that I bought from Thomas.de.
The tremolo bar was missing and there is no way to purchase a trem bar for a Hohner bridge. Closest I could get was a tremolo bar from Ali-Express. I bought a chrome one (just as Eddie’s) and it needed a little bit of tape at the end that goes into the bridge to give it a snug fit.
And what me amazed the most, installing the new head piece including a zero-fret made the guitar excellent playable. That’s when I realized how important it is to have a correctly cut nut. I never paid too much attention to the nut depth thinking it would only affect the playability at the first fret. But that’s not the case, it impacts the playability all over the neck. Installing the zero-fret solved this and I have to check all my guitars with a conventional nut if the nuts slots are deep enough.
The end result: